|
Focus Bracketing with the E-500 |
|
|
My other articles related to the |
|
Hidden deep in the The principle of focus bracketing is simple: with the option activated, the camera will take the first picture as focused manually, and then 2, 4, or 6 extra frames, moving the focus plane a tad forward or backward in each. This way you can later choose the version focused most to your liking. The reason why this feature cannot be used with manual focus (legacy) lenses is obvious: these lack the focusing motor, therefore the focus cannot be adjusted by the camera. On the other hand, I would like to see an option to bracket the focus originally set by the AF circuitry. Only after having used the camera for a month or two, I realized that this limitation can be easily bypassed, in a most convenient and logical way. Here is how. Preconditions In case you haven't given this a second thought: focus bracketing is useful only when you are shooting stationary subjects from a tripod. Almost any movement of the camera or the subject will, obviously, change the subject-to-camera distance, so that the whole idea of bracketing loses sense. Therefore I'm assuming you will be using a tripod and, preferably, a remote control (an infrared one, as the E-500 sadly lacks a wired remote socket). Because the subject is stationary, there is no need to use the sequential drive mode; single frame is perfectly OK here; you will be releasing the shutter as many times as it takes for the bracketing sequence to be completed. Camera settings
The only non-obvious step here is to assign the lock (AFL/AEL) button to single-shot autofocus in the manual focus mode. This is a part of my preferred E-500 setup: use the menu system and go to When you set the MF Mode 3, then whenever you press the Lock button while the camera is in the MF mode, the AF system will be activated to find the right focus. The focus will then stay as set until you turn the manual focusing ring on the lens, or press the Lock button again. In other words, this is autofocus on demand — and the focus bracketing will still work, as formally you are in the MF mode!
As you will be most likely bracketing the focus only in critical applications, you may also think of activating the mirror lock feature, to reduce camera vibrations: For more control over the depth of field, you will be probably using the aperture priority autoexposure, but this is your choice; this article is supposed to be about focus bracketing...
Now you have to decide how many frames do you want to have in a bracketing sequence, and how much do you want the focus setting to change between frames. This is done from the menu system (bracketing functions are the only ones directly related to shooting and not accessible from the Control Panel, too bad!):
with a "step" being some arbitrary unit, known only to Olympus (we, camera users, are illiterate dummies, not deserving access to such information). Anyway, two steps are more than one, so with some practice you will know what you want for a given application. Mysteriously, there is no option for three-frame sequences (which is the only choice for all other bracketing functions in this camera). Shooting
Now, your camera is all set up and mounted on a tripod, the subject in place, light OK — ready to shoot. Make sure the Control Panel is on (useful although not absolutely necessary). Use the tripod head to point the camera at the place you want to be critically focused, and press the Lock button (denoted as AEL/AFL and situated to the right of the finder eyepiece. You will see the central AF light in the finder blink, unless you used the Have a look at the Control Panel. If the bracketing has been activated, you will see a black [BKT] symbol displayed near the top right or center-bottom (simple or full display mode, respectively). You may also want to verify all other settings. Press the shutter release (or, better, use the infrared remote). The [BKT] symbol will become bright blue; this means you are in a middle of a bracketing sequence. Keep shooting until the symbol becomes black again; this means the sequence is complete, and the camera is ready for another one. To cancel a bracketing sequence and start another one, turn the mode dial to some other position and back. This is basically all you need to know in order to use focus bracketing with the advantage of autofocus. Simple and, sometimes at least, handy. Sequence order The first frame of the resulting sequence is shot at the "nominal" focus, i.e., as set by the AF system activated with the Lock button. The remaining ones follow in the order of increasing focus distance. This is illustrated in the following example, with bracketing set to seven frames in two-step increments. To make comparisons easier, I've chosen a magazine ad as a subject, shot at a 45° angle. The camera was mounted on a small tripod, and I've used a three-second mirror lock, as well as an infrared remote, shooting in the single-frame drive mode. (You cannot use the remote in the sequential drive mode anyway, as these are two mutually exclusive options of the same setting.) |
|
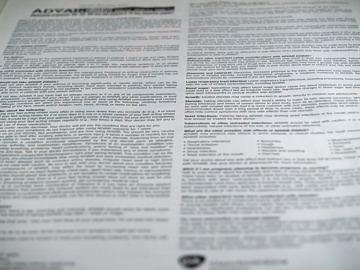
Full frame, reduced in size, and re-sharpened, of the sixth picture in a seven-frame sequence. Olympus E-500 with the 14-45 mm, F/3.5-5.6 ZD zoom lens at 45 mm. Aperture priority at +0.3 EV: 1/20 s, F/5.6 (fully open), ISO 100. White fluorescent light, WB by reference. Tonal range stretched in postprocessing to bring out the whites. (Actually, a +0.7 or +1 EV exposure compensation would be better here.) |
|
|
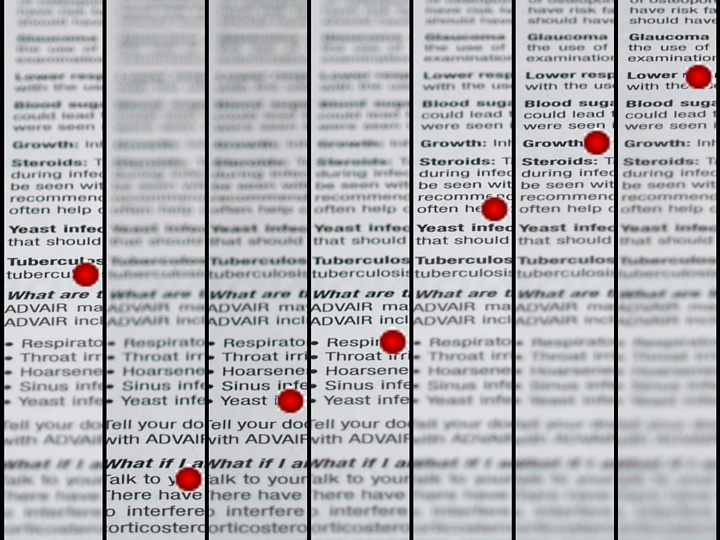
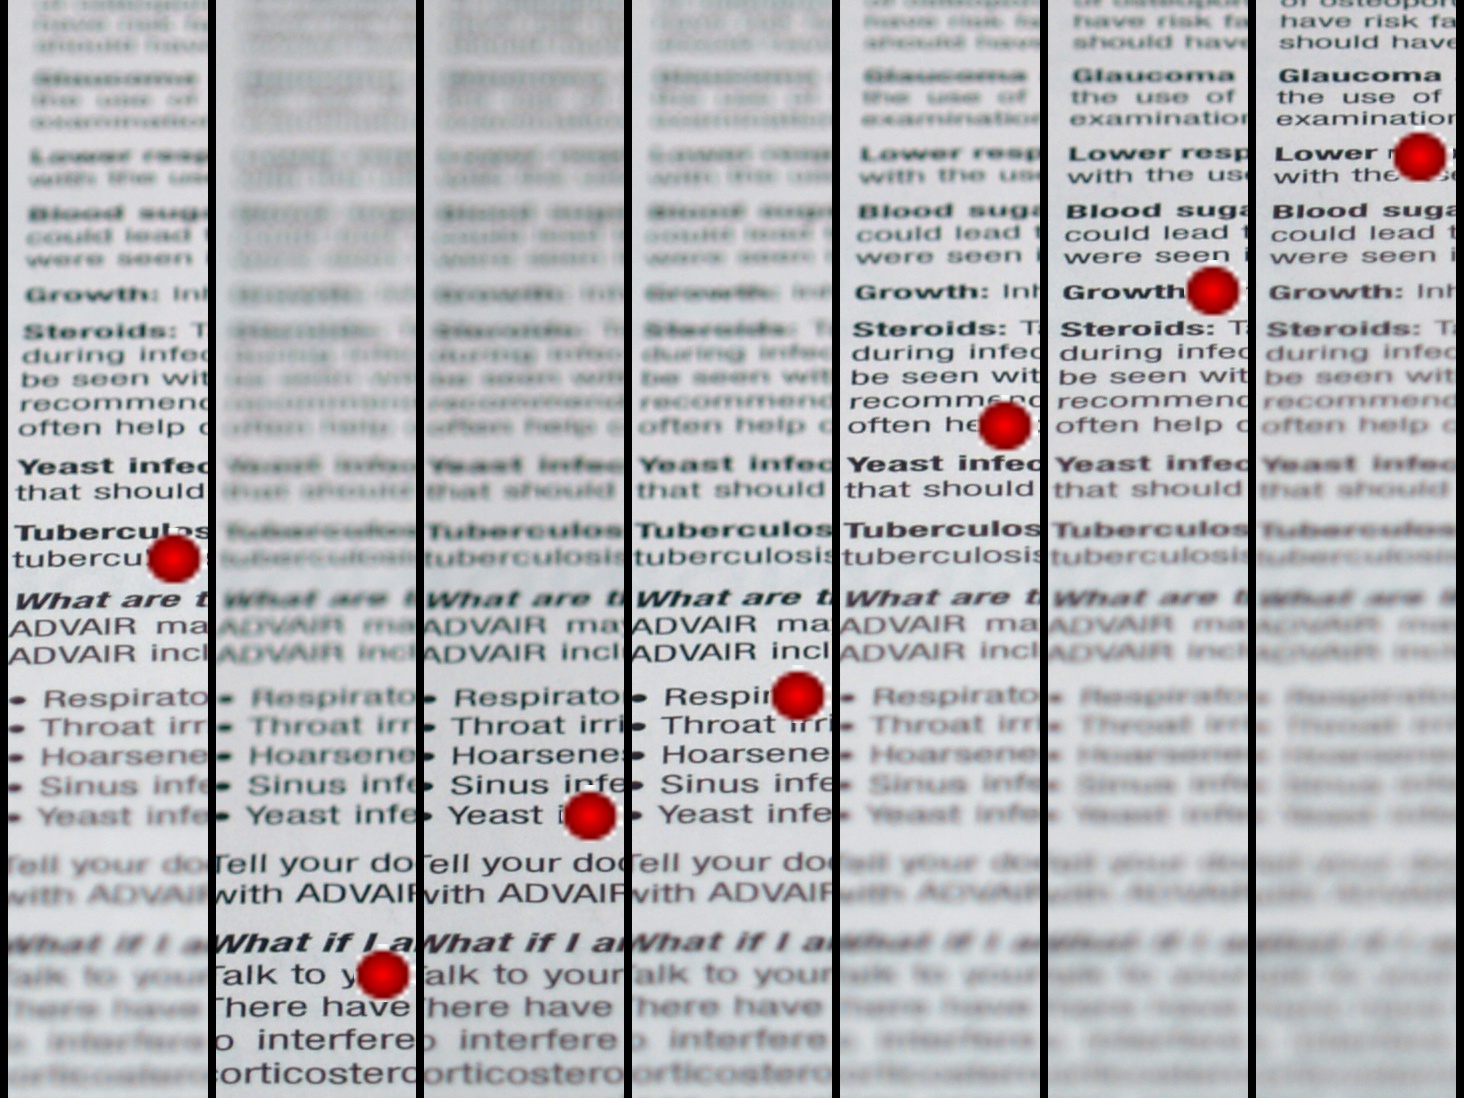
Here are sample strips from all seven frames (1..7 from left to right as shot). Each strip was originally 1098 pixels tall (almost 50% of the frame height) and 200 pixels wide. The composite shown below has been reduced to about 50% and slightly re-sharpened after that; a full-size version (no reduction or sharpening) is available here. Red dots, added in postprocessing, show where the sharpness is at its best, at least as far as I can tell by eye. | |
| |
|
Does this work with Sigma lenses? Yes, it does — if you know how to do it. Sigma lenses in the Four Thirds mount have an extra switch (marked as AF/M) on the lens barrel. This switch disables or enables the AF coupling between the camera and lens, allowing you to turn the focusing ring by hand in the M position only. Obviously, in this position the focus will not be affected by anything the camera may try to do. In order to use focus bracketing as discussed in this article, leave the AF/M switch on the lens in the AF position, but switch the camera to MF. Then everything will work as described here. If you insist on "real" manual focus with bracketing, switch the lens itself to M, focus by hand, and only then set the lens back to AF, before shooting the bracketing sequence. This seems to work just fine, although I haven't performed any systematic tests on focus accuracy. Conclusion This simple trick allows the photographer to get the best of both worlds, combining the practicality of autofocusing with safety of focus bracketing, albeit it is limited to AF lenses and static subjects. It also requires that you devote the [Lock] button to autofocusing while in the manual focus mode (in other modes the button can be assigned to other functions). I hope you'll find it handy, at least in some situations. I did. | |
|
|
My other articles related to the |
|
Evolt® and Olympus® are registered trademarks of Olympus Corporation.
This page is not sponsored or endorsed by Olympus (or anyone else) and presents solely the views of the author. |
| Home: wrotniak.net | Search this site | Change font size |
| Posted 2006/06/18; laswt updated 2007/05/20 | Copyright © 2006 by J. Andrzej Wrotniak |
 AF point selection button to choose one of the side spots (auto-choice is not available in the MF mode). Now you can re-frame and start taking pictures.