|
Godox, the Brood of Godzilla The TT350o Flash Unit |
|
|
My other articles related to the |
|
First, a disclosure. I am, at most, a casual flash user. I will do everything to avoid using flash, like setting the ISO to 25,600, or persuading the audience that a heavy motion blur they see was intentional; a legitimate way of expressing myself.
My greatest flash achievement was triggering optically a simple slave, to have an extra modeling light. Sometimes I will use light bounced off a wall or ceiling, but that's it. No smart tricks. In particular, no multi-flash, remote-controlled setups. Still, it feels good to have a "real" flash in your drawer (by which I mean a flash with its own power and a guide number higher than that of the tiny, cute clip-on unit). My old favorite That flash for many years was the Olympus FL-36. On the market since 2004 or so, it was, for many years, one of the only two models available with bounce/tilt and Olympus TTL automation. (The other model was Olympus FL-50, at $400 twice as expensive.) The model was later upgraded to FL-36R, with 'R' standing for "radio-controlled". Those who don't use this feature (myself in this number) did not need to upgrade. Quite recently my FL-36 suffered a failure: the plastic ring, securing the flash foot against the hot shoe, broke in half. While I still can use the unit carefully, on a tripod, I needed a replacement. |
|
Competing against... | |
|
The current flash at this tier of Olympus line-up is the FL-600R, introduced in 2012. There are two changes in this model, compared to FL-36R: it uses four (not two) AA batteries, and adds a continuous (LED) light in a place where many similar units have a second (fill) burner. The guide number, however, remains unchanged at 35 m (ISO 100). Having used this flash for a while, I may say I like it. Well-specified, well-designed and well-made — we've got used to that. Still, a 4-AA unit may be a bit too large and too heavy for a casual user on the go, like myself. I also would rather prefer to have a second, fill-in burner to open up eye cavities, instead of the LED light. And then, of course, there is the price. I think $240 is too much for a mid-line (even if very nice) unit. Ten years ago I was willing to pay $200 for the FL-36, as the competition was quite behind in terms of technology and quality. It seems no longer to be the case. |

(Promotional image by Olympus) |
|
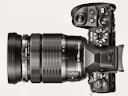
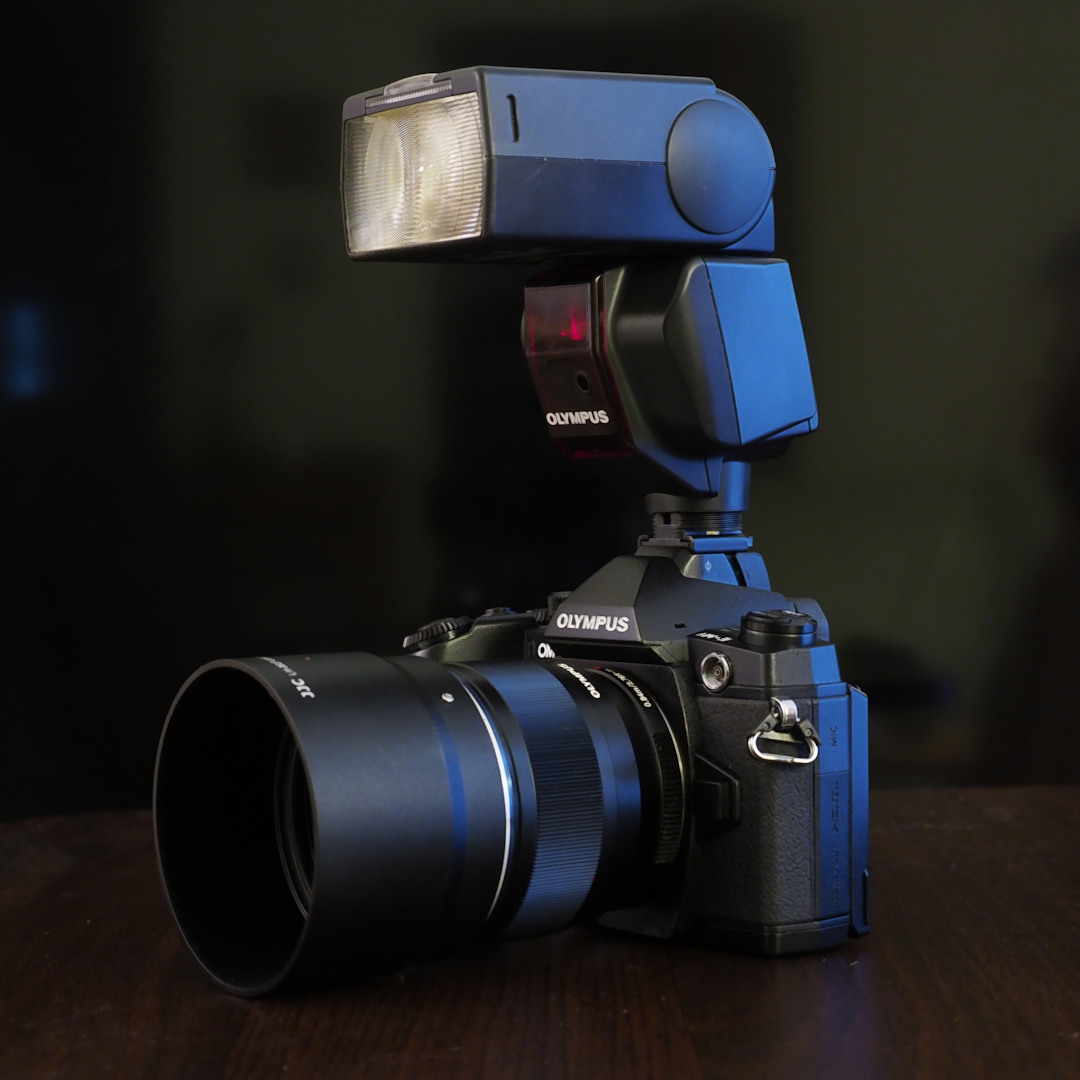
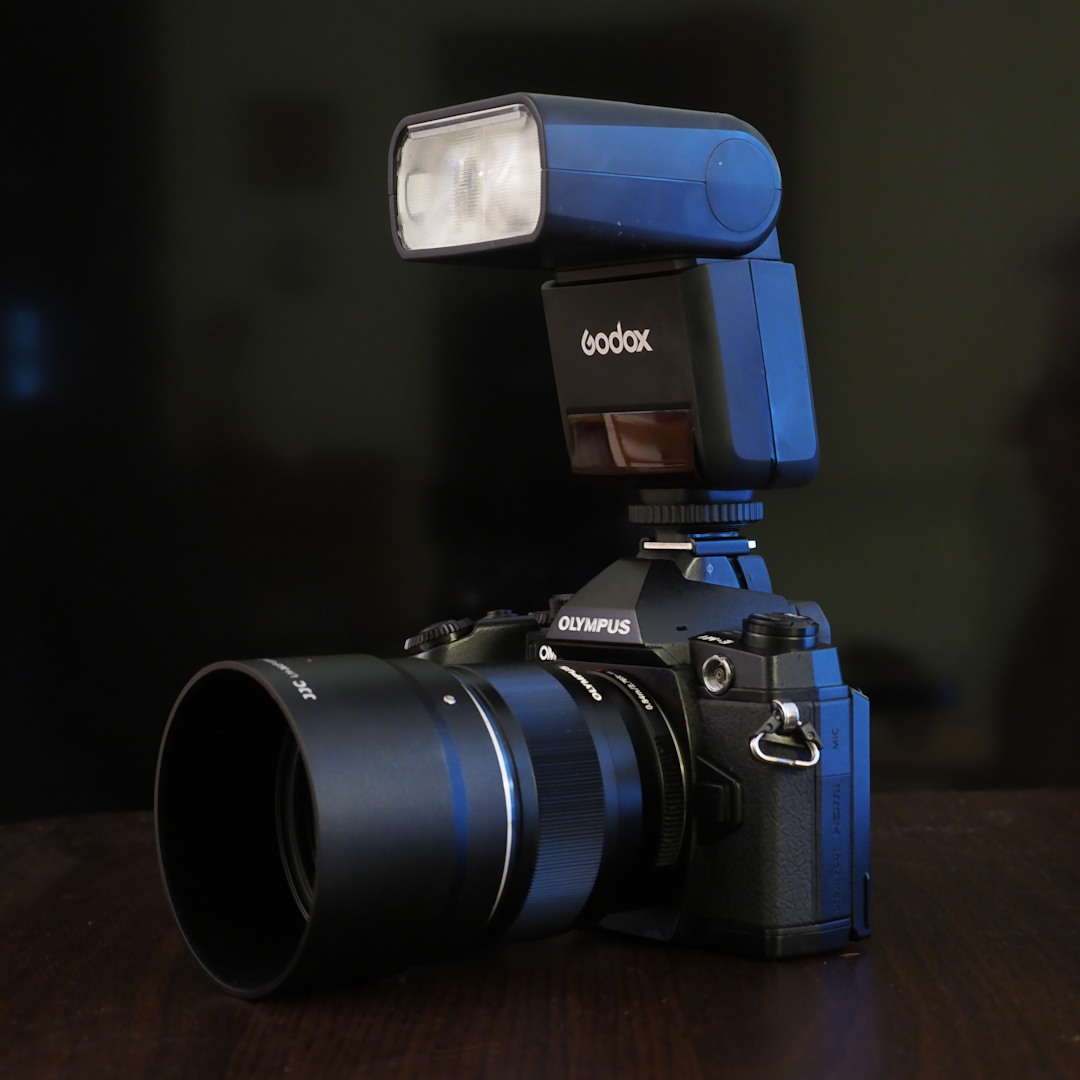
Enter Godox There are not so many flash makers offering units compatible with the Olympus TTL metering system. Panasonic, as a μFT partner, would be an obvious choice, but they are too expensive. Metz is a very well known independent flash supplier. but they are pricey, too, at least the models I considered were. This leaves Nissin (too expensive for what I need) and Bolt (I don't like their units and most people seem to agree). Anyone else? Enter Godox. A Chinese company on the market since 1993, focusing on photo light equipment (including their own radio-controlled flash system), claiming 1000 employees and a 15-people R&D team. Most importantly, they are highly praised on discussion forums for innovation and responsiveness, and seem to work real hard to get our money. Their recent compact unit, the TT350, available for Canon, Nikon, and Sony, and getting very good press on the Internet, was just released for Olympus/Panasonic and Fujifilm systems. At $85, I consider it a steal, so I placed a day one order with B&H — not much of a risk, after all. Look and feel; size and weight The make and finish of this Godox unit match those by Olympus. Maybe a bit less ornate, but I like that. It does not look or feel like a cheap flash. Comparing its size against the FL-600R does not make much sense, as that is a four-battery unit, but here is a comparison with the FL-36. The TT shaves a few millimeters off every dimension of the FL. It is the thickness (front-to-back) where it counts most, as the smaller flash better fits into a camera bag pocket. | |
|
| ||
|
Olympus E-M1 Mk.II, MZD 12-40/2.8 @29 mm | |||
|
In the straightened-up "brick" shape the size is 140×62×38 mm (compared to 150×64×50 mm for the FL-36).These numbers can be interpreted as a 31% reduction in volume. Not revolutionary, but noticeable. The TT350o weighs 200 g (w/o batteries), very close to the FL-36R (210 g) and 20% less than FL-600R (255 g plus extra batteries). Mounting on the camera The flash is mounted into a dedicated, four-plus-one-pin Olympus digital hot shoe, which, in addition to triggering, is used for passing data between the unit and a camera. Interestingly, it uses just three out of four small pins, while the tiny FL-LM3 flash also uses the fourth one, but not the big, central contact. Once slid into place, the hot shoe is secured with a threaded lock ring holding a (mechanical) locking pin in place; a simple but robust solution. The shoe plate itself is made of metal, a rarity these days. For comparison, the FL-600R has a lock lever instead, to tighten the assembly. The unit's body leans forward, to reduce a chance of the lens casting a shadow into the picture area. I've checked that with the MZD 12-100/4.0 at 12 mm, with the hood on: no shadow. Bounce and tilt
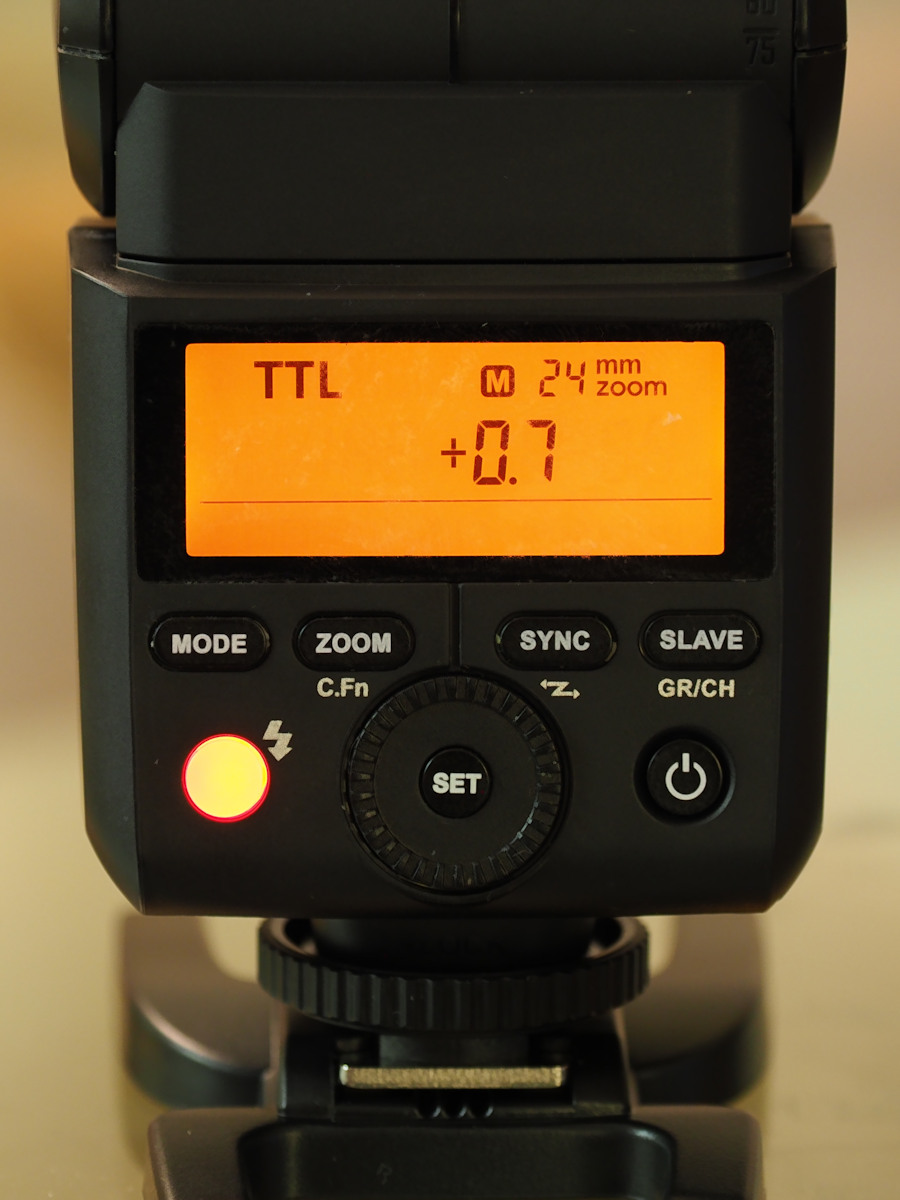
The flash head can pivot vertically providing a tilt angle between The tilt, also not locked, allows angles up to 90° to the left and up to 180° (straight back) to the right. Directing the head upwards or tilting it does not affect the head zoom feature (see the next section); I believe it should. Head zoom If the angle of the beam of light produced by a flash is larger than that of the taking lens, a part of the light output is wasted on illuminating objects outside of the image. Therefore it is handy to be able to adjust the output angle to your focal length (with some margin). This is most often done with a Fresnel lens placed in front of the flash burner; changing the distance between both adjusts the angle. The TT350o gets the lens angle from the camera and adjusts its own angle as needed, using an internal motor. Unfortunately, the actual focal length is not shown, just the AU symbol. The user may override this and set the focal length manually, using a button and a dial on the unit's back. In that case the selected focal length will be shown in the display panel as EFL (Equivalent Focal Length); for μFT this is the real value multiplied by two. Whether automatic or manual, the adjustment goes in a number of discrete steps: EFL of 24, 28, 35, 50, 70, 80m and 105 mm. This means that the covered range of actual focal lengths is from 12 to 52.5 mm. I consider this a reasonable choice.
In Olympus flashes of this type, when the head is bounced or swiveled (except for the Wide-angle panel This spring-loaded, translucent diffuser panel, when pulled out of its storage slot atop the burner (assuming your fingernails are good enough), will cover most of the front head surface, increasing the angular coverage of the produced light beam. With the panel active, flash coverage will be sufficient for a lens with a focal length of 7 mm (14 mm EFL), and the latter value is reported in the display. The head switches to manual zoom mode, placing the burner in the wide-end position. See the Vignetting section for how it works. A minor problem: moving the panel just half a millimeter out of the "stored" position is enough to activate this "panel mode": the head no longer zooms, which looks like there is a malfunction. Make sure the panel is always pushed all the way in when not in use. Catch-light panel This tiny rectangle of white plastic shares the storage slot with the wide-angle panel. It is intended for use when light is bounced off the ceiling, redirecting some to create eye catch-lights; maybe even brightening shadows in eye sockets, a flip side of using bounced light. Guide number and range The guide number (GN) for a given flash unit is the maximum value of the product of the aperture setting (F-number) and shooting distance at which the flash provides light for a properly exposed image. It is usually defined for ISO 100, and the value increases as square root of the ISO setting. For example, at ISO 200 the GN is 1.41× higher, while for ISO 400 it doubles, compared to ISO 100. The GN is expressed in units of length, usually meters or feet. It is strictly related to the energy output of the flash (to which some people refer as "power", which means something else: the rate of energy use). A flash unit with GN twice as large provides four times the energy output; this is a square dependency. This is not all, one significant factor remains. Because the light output is directed within a beam of a certain angle (depending on the head zoom setting), the GN will depend on that angle (or EFL). To compare two units it is best to use the numbers at the same EFL — 50 mm is a nice choice being considered "standard", but, strictly speaking, it is a separate comparison for every EFL. If the EFL we're interested in is not among the discrete "stops" on a given unit, we should use the next smaller value. So, at ISO 100 both the TT-350o and FL-36 (or FL-600) have the same GN of 36. The same? Not quite. The Godox value is defined at 105 mm EFL; the Olympus one — at 85 mm. These two values cannot be directly compared (unless we are shooting at EFL of 105 mm and above). Some manufacturers provide a table with GN versus EFL; unfortunately, not Godox. Olympus does, for EFLs ranging from 8 mm (GN=12m, diffuser) to 85 mm. The only option left is to use an idealized and inaccurate model, assuming FN changing like reciprocal of EFL. Within this model, the Godox GN at 85 mm would be 29, well below that for the Olympus flash (66% in terms of energy burst). Using this model over larger differences in EFL becomes increasingly inaccurate; for EFL = 50 mm my educated guess of 22 m is probably a better alternative (compare that to 28 m for the FL-36R). Don't blame me for the missing GN data for the EFLs between 12 and 50 mm. Blame the Godox people. They owe us those numbers and let's hope they will release them (as measured) soon. Now, about the flash range. First, I'm going to assume that ISO 400 will be used indoors with flash; this doubles all ISO 100 GN values. At the EFL of 105 mm the GN will be 72 meters. That's a lot! At F/4 you can shoot from up to 18 meters or 60 feet (13 m using ISO 200). But this is a narrow angle; let's try the 50 mm EFL, where my crude ISO 400 GN estimate is 44 m. This, at F/4 again, gives us a range of 11 meters (7.5 m at ISO 200). All this, of course, holds for direct flash, pointing at the subject. The numbers will be reduced drastically (and often unpredictably) when we bounce the light off the wall/ceiling. The minimum shooting distance in all cases is specified as 0.5 m. I suspect the number is taken off the ceiling, too. Flash exposure modes Switching between these is done by pressing the [Mode] button on the unit back. Three modes are available:
High-Speed Sync is another option, available in TTL and Manual modes: it allows for flash use at shutter speeds higher than the "regular" sync speed (1/250 s for the E-M1 II). At such speeds there is not a single time instant when the whole image area is exposed to the light (check this if you're not sure what I mean), therefore the flash provides a series of short light pulses covering the whole time when the shutter slit travels along the image sensor. You synchronize at higher speeds, but pay a price in terms of lower effective illumination (guide number), greater energy use, and more heat dissipation. A typical application: providing fill-in flash in strong ambient light with wide apertures for shallow DoF. TTL exposure compensation Flash exposure often needs adjustment, different for different subjects and conditions. Most Olympus cameras provide two independent compensation settings: one for the ambient light, and one for flash only. There is also an option to merge the first one into the second. Like many other flash units, TT350o adds a third way to adjust its output, using a control dial on the unit itself. This on-flash adjustment is applied in addition to the flash compensation chosen on the camera. As you will see in one of the following chapters, I'm using a significant amount of compensation on the E-M1 II for all four TTL flashes I tried it with. In this situation it is better to have that defined on the camera. If and when I discover any deviation from that on an individual unit, I will add it on that particular flash. A misbehavior? A strange little story: the first two days the TT350o was stubbornly ignoring any exposure compensation entered on the flash. (And, yes, I was pressing the [Set] button after dialing in the value.) On the third day it started using the correction like if nothing happened. I keep notes and samples from all my tests; I have to exclude any kind of errors in the procedure. One thing changed in-between, though: I upgraded the camera's firmware from v1.2 to 1.3. Still, slim chance, and I'm still puzzled. Regardless of the radio remote functionality (about which I'm not writing in this report), this unit can be put in one of two optically-controlled slave modes: it will go off when another flash (yours or anybody else's) fires within a reasonable distance. These slave modes, fittingly named S1 and S2, are accessible only when the exposure mode is set to Manual. The difference between them is that S2 will ignore the first flash it detects, firing only at the second one (in a quick succession, details unclear). This will work when the triggering unit uses a pre-flash for metering purposes, like in the Olympus system.
| Thus, triggering the TT350o with a shoe-mounted unit we should set it as follows:
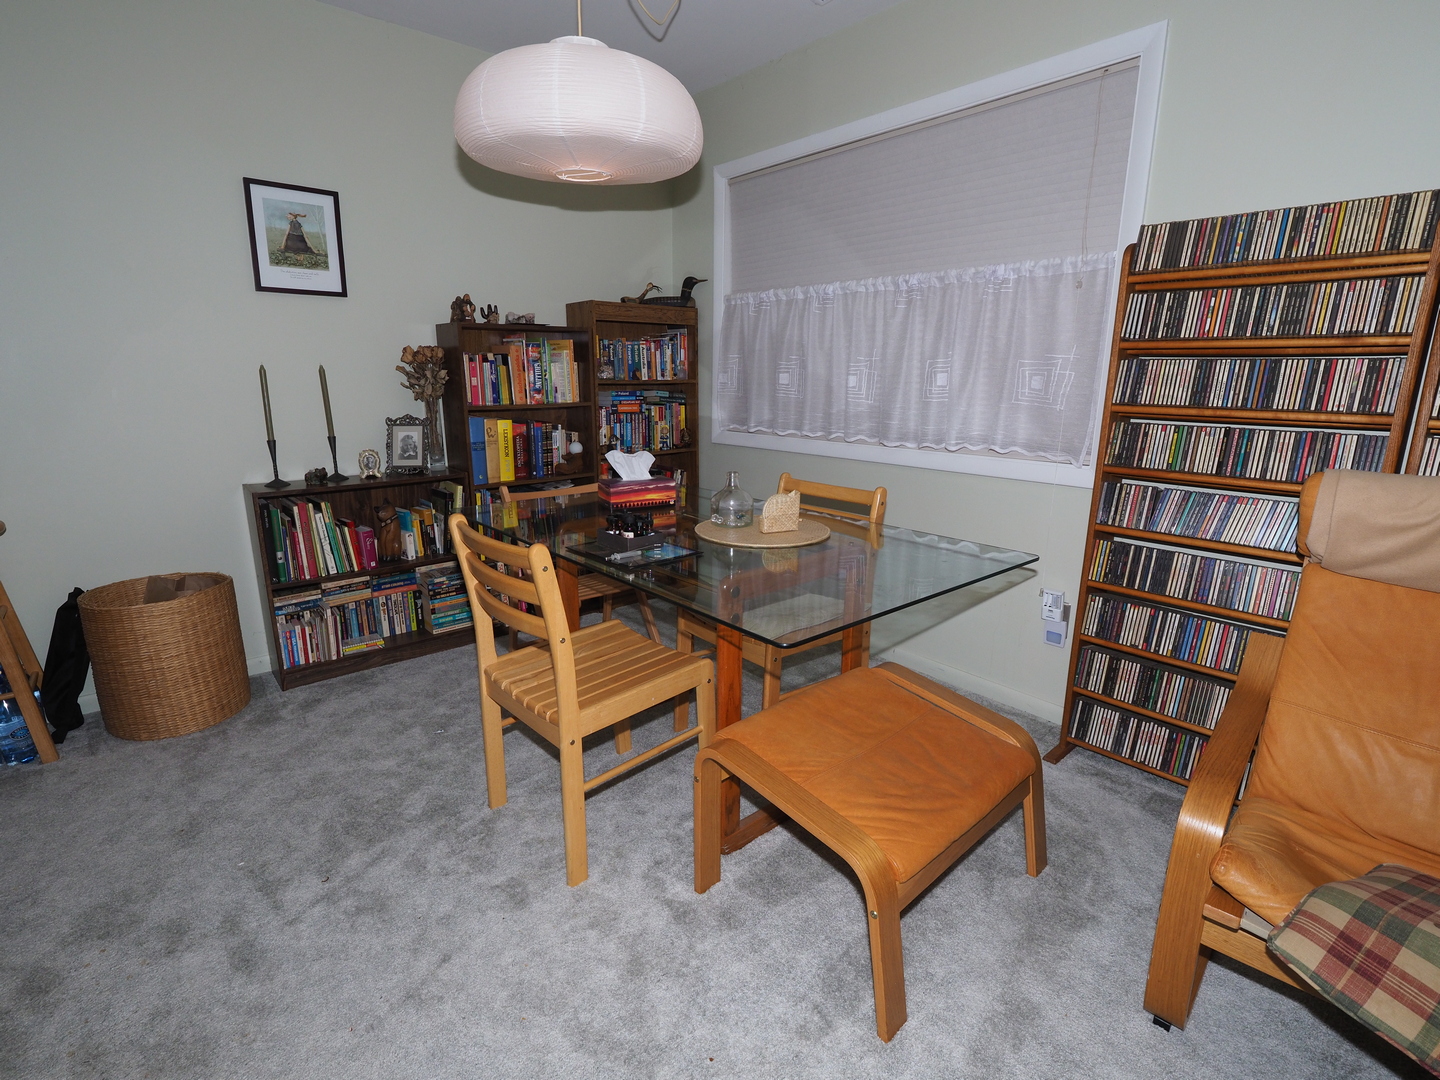
For this picture, the shoe-mounted, triggering unit is the FL-LM3 micro-flash by Olympus, far too weak to illuminate the scene in bounced light, working in TTL Auto. The TT350o (on the table) is set to 1/128 power in the S2 slave mode; head zoom at 100 mm EFL for a spotlight effect. Exposure was set for the faces. Click on the image to get a closer look.
| 
Olympus E-M1 II, MZD 12-100/4.o at 80 mm | |||||||
|
Controls All controls are on the unit back: seven buttons, a dial, and an LCD. The four identical buttons in the top row are too small for my liking and offer almost no tactile feedback. The display is bright and contrasty (when lit), but some of the characters are too small and the icons could use some work. (Still, the display is better than that of FL-36R).
The top four buttons are:
|
Two round buttons with hardly any functionality:
The control dial, with a centered [SET] button, is used mainly to set TTL exposure compensation. The flash remembers the settings while batteries are being changed . The display light can be set to stay permanently on (see below). Yes, it consumes power, but makes your life so much easier...
| 
| Customization and update Using the [Zoom] button and the control dial, you can customize the flash by changing two features:
The flash has a USB port for updating the firmware. No details on this are available at the moment. Integration with Micro Four Thirds cameras The manual says the TT350o "can be used on" the following cameras:
I am sure this list is grossly incomplete. I've been testing this unit mostly on the E-M1 II (not listed here) without problems; I've tried it also on the original E-M5 (not listed) and the E-PM2 "Mini" (not listed), and everything seems OK. The flash co-operates with the camera on a number of issues; here is a (possibly incomplete) list:
I was surprised to see (in the EXIF data) that TT350 reports to the host camera as FL-50. Is this just an error, or a way to work around some Olympus-imposed restriction? Power The TT350o is powered by two AA-sized cells (alkaline or NiMH); the manufacturer recommends the latter, claiming 210 full-discharge flashes from a freshly-loaded, 2500 mAh pair. The reported flash recharge time varies from .1 to 2.2 seconds. Two seconds for a full recharge sounds very good, so I checked that for myself. A pair of five-year old Sanyo eneloop batteries, after a few hours of testing and experiments: 4.0±.2 seconds — not too shabby! Then a freshly-charged pair of the same vintage: 2.3±.2 seconds. Wow. Low battery state is signaled with a small icon in the display; too easy to miss. Anyway, I'm very pleased with battery performance of this flash. This is no longer 2005. Documentation and goodies included The included bi-lingual (Chinese/English) manual is not very bad, just moderately bad, which means better than 60% of manuals in this industry. Certainly better than Olympus manuals. Still, it has a major problem: I can't read the bloody thing! The print is too small! The pages are about 3 inches wide. Make that 4½" and this will help a lot. Well, at least there is a PDF version on the Godox server, so I was able to read that. The other goodies in the box include:
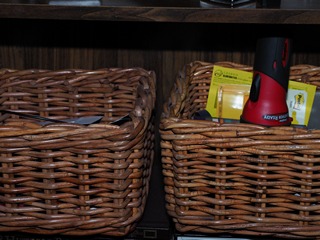
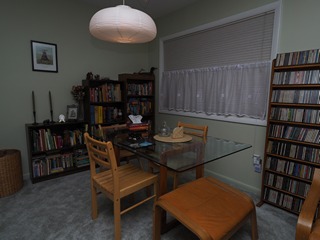
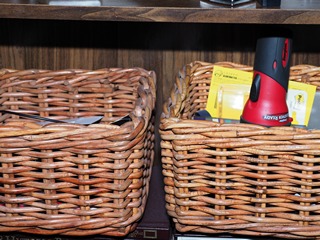
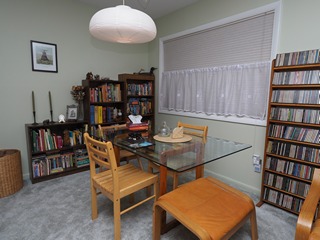
Test results: exposure Over the years of using the Olympus TTL flash metering I've got used to consistent, accurate, and predictable results it delivered. Here are the thumbnails of some typical pictures out of about 500 I took while testing the Godox flash; these are with TTL metering and no exposure compensation of any kind. Whenever I can (or remember), I take my flash test pictures in two versions: direct flash (head directed at the subject), and bounced flash (head directed at the ceiling). If I'm close to the maximum flash output, this will show in bounced-flash pictures first. For the presentation I chose the bounced-flash versions, except for the basket subject. | ||
| Olympus E-M1 II, TT350o, no compensation | |||
| 
| 
| |
| 
| 
| |
|
Looks like these pictures (and almost all others) are underexposed by 1 EV or so. An important question: is this the flash or the camera? |
| Olympus E-M1 II, no compensation | ||
| FL-36 | FL-LM3 | |
|
This will be easy to check; here is the bookshelf scene as shown above, but re-shot with the FL-36 and then — with the FL-LM3, the miniature unit included with the E-M1 Mk. II.
These frames leave no doubt: it is the camera. Regardless of the flash used, TTL-metered pictures from the E-M1 Mk.II are under-exposed by about 1 EV. |
| 
|
|
| 
| |
|
Let us check the TTL metering on two other OM-D cameras I have: E-M1 and E-M5. Not that this is important, but it is nice to know such things. |
| TT350o | ||
| Olympus E-M1, no compensation | Olympus E-M5, no compensation | |
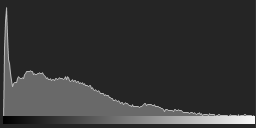
| The E-M5 image is about 1 EV too low, while the one from E-M1 — just right. It may look a bit dark at the first glance, but look at the luminance histogram; see also a larger version. | 
| 
|
|
| |
|
The underexposure we see is quite consistent between flashes and between frames — for a given camera (I checked about 500 images; that's a lot). Therefore the best way to handle it would be by entering a flash compensation in the camera itself, not in the flash. For my Here is how the images from the first set look when shot with that +1.3 EV adjustment. |
| Olympus E-M1 II, TT350o, +1.3 EV flash compensation | |||
| 
| 
| |
| 
| 
| |
|
Yes, in two histograms we can see a little bit of highlight clipping (or almost); +1.0 EV would be better. (The third one is fine the way it is, though.) The bottom line? The TT350o is doing a perfect job of emulating an Olympus unit, which it should. Flash vignetting is similar to lens vignetting, even if the underlying mechanisms differ. It is not, however, handled in image processing (although it could). Its magnitude (for a given focal length) can be judged by viewing a flash picture of a white wall. In the past, I was lagging behind with those pictures, so here is a set of eight (those for 8, 9, and 10 mm were shot with a diffuser). |
| Olympus E-M1 II, TT350o, flash compensation +1 EV | |||
 8 mm |  9 mm |  10 mm |  12 mm |
 14 mm |  18 mm |  25 mm |  40 mm |
|
While these pictures are really useful only to people who are taking more pictures of white walls, it feels good to have them.
|
| 
| 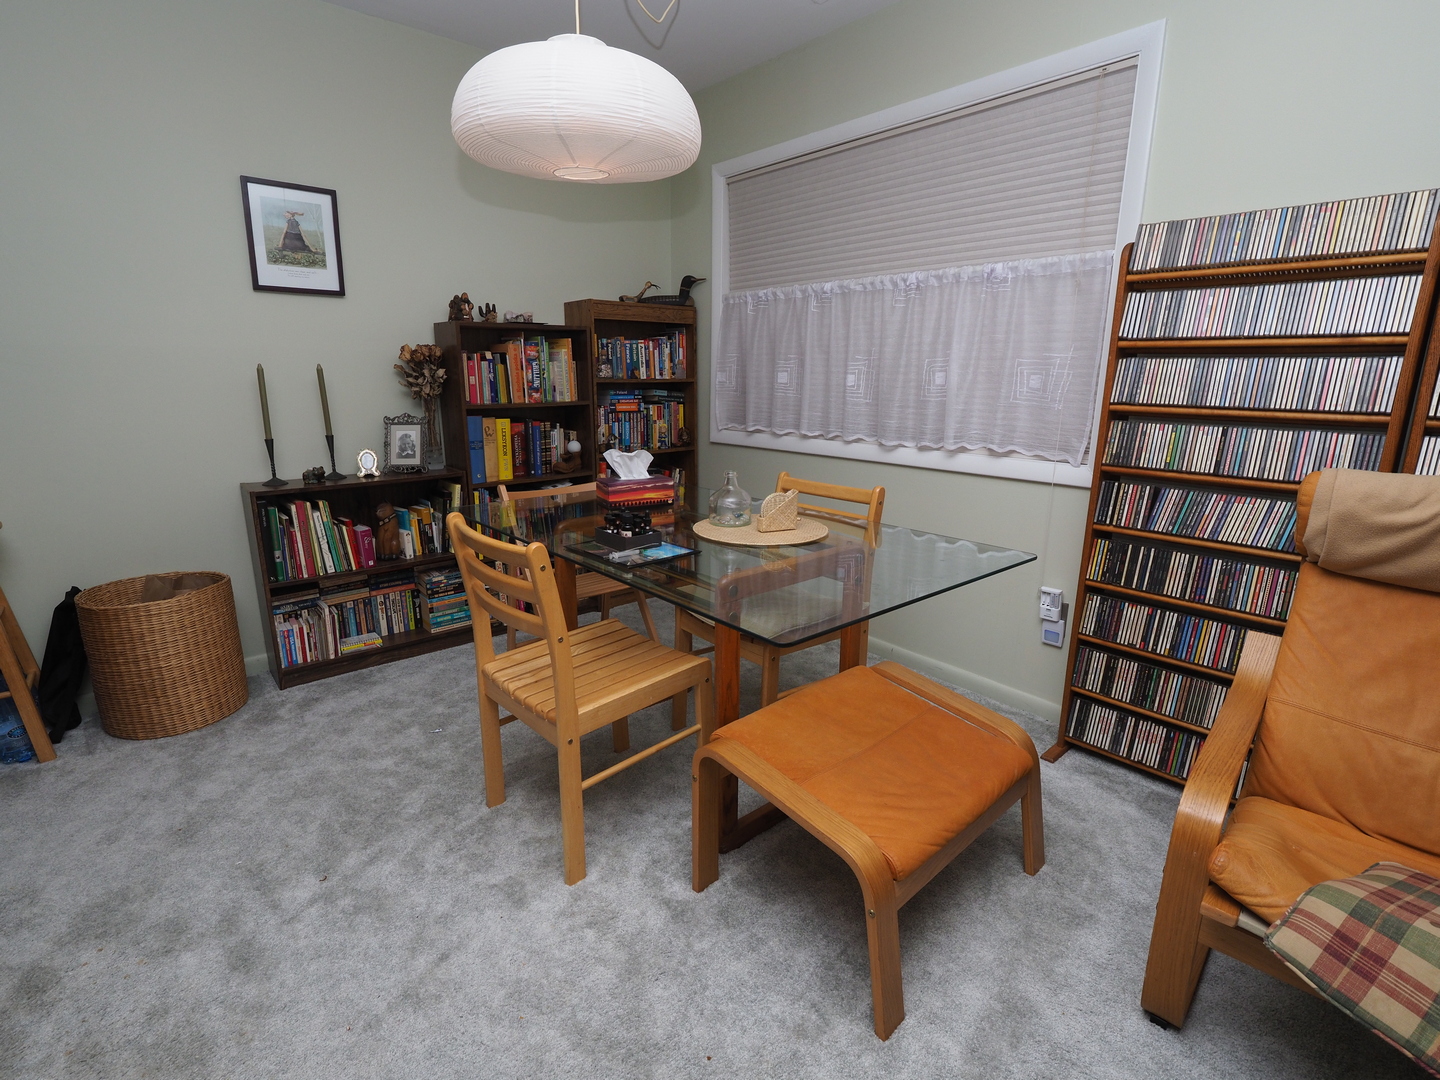
| Here is another picture of my breakfast nook; this one at 8 mm; two versions: direct and bounced light. Flash exposure compensation was +1.3 EV. We can see some vignetting in the direct-flash version (carpet bottom left), but it is not disturbing at all; to the contrary, darker corners make a picture more orderly. White Balance When the camera (OM-D series, at least) senses a flash being used, it switches to Auto WB or Flash WB setting, depending on your setup. With flash being the predominant light source in my tests (almost no ambient light), I could not see any difference. The white balance seemed just fine with both settings. Conclusions Take what I said about FL-600: "Well-specified, well-designed and well-made", add to that size, weight, and price of the TT350 — and you get a very attractive offer, with full support for Olympus TTL autoexposure. (And I'm not even mentioning the Godox radio control system about which I know nothing.) Many TT350 features are implemented in a way that you don't notice them: they just are there and they work; we only see them if they stop working. This is a sign of good design. Seriously, my best recommendation.
As much as I like this flash unit, there is always some room left for minor fixes and improvements. Here is my personal list, with the most significant items in the Firmware section, and the least significant ones in Hardware. Things to consider for firmware update:
Things to add in documentation update:
Things to consider in the next hardware version (not urgent):
None of the above are critical fixes or enhancements; they all rather belong to the nice-to-have category. My recommendation for this unit remains valid regardless of when (and if) any of these points are implemented. References Link to the Instruction Manual | ||||
|
|
My other articles related to the |
| This page is not sponsored or endorsed by Olympus (or anyone else) and presents solely the views of the author. |
| Home: wrotniak.net | Search this site | Change font size |
| Posted 2017/07/03; last updated 2017/07/13 | Copyright © 2017 by J. Andrzej Wrotniak |
 ] duplicating as charge indicator light. Press it for a test flash.