Olympus E-1, Critically Annotated

My other articles related to the Olympus E-System cameras.

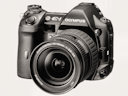
The E-1 is a significant camera in the evolutionary process of digital photography technologies. This is the first interchangeable-lens SLR model ever (from any manufacturer), developed from ground up as a digital camera: unlike all competing models, it did not originate as a modified film SLR.

This is not the first venture of Olympus into the digital SLR area. The E-1 bears some resemblance to two earlier digital SLRs by Olympus: E-10 and E-20.

Those, however, differed in one essential aspect: they did not offer lens interchangeability. (The latter, I believe, being a very desirable feature, is not without its drawbacks; everything has its price.)

Many features of those cameras, including most of the ergonomics, migrated into the E-1, although interchangeable lenses and bigger sensor size necessitated a complete reworking of the camera internals.

The E-1 is also the first camera following the Four Thirds standard. Developed jointly by Olympus and Kodak, this standard is based on a 4/3" sensor, and specifies the lens mount (including its distance from the image plane) and the communication between the lens and camera body. Any lens following this standard will work with any camera body adhering to it, regardless of model and maker.

So far, however, no manufacturer other than Olympus makes cameras based on the Four Thirds standard, and it is not expected to happen in a predictable feature. The major players in the SLR field (Canon and Nikon) decided to stick to their respective, proprietary mounts, inherited from film cameras (although with some modifications in electronics). One of the reasons was to allow the buyers to reuse their existing SLR lenses (with some limitations); another — not to open their camera systems to independently made lenses, or at least to make it more difficult. Even Kodak and Fuji (both participating in the Four Thirds initiative) offer their SLRs with Nikon and Canon mounts only.

Whether the E-1 and its followers will succeed, remains to be seen. If they fail on the market, it's not for technical reasons: the E-1 is a beautifully designed and executed camera. (If you are old enough, you may remember the Beta versus VHS controversy; the better player does not always win.) Regardless of that, the E-1 is, I believe, a milestone in digital photography, and will find itself a niche of dedicated followers.

This article contains a detailed walk-through through E-1's specs and features, heavily annotated with my remarks on their meaning, significance, and background. Additionally, my English friend and an experienced photographer, John Foster, annotated my annotations (yes!) with his hands-on comments, based on almost a year of using the camera. John's annotations are always clearly marked as such. John also wrote a User Report on the E-1, posted as a separate article on this site.


Body

Construction:

Magnesium alloy cast

Continuing the tradition of E-10 and E-20, at least as good. A tough act to match.

John: It has matched and dare I say, beaten the previous E series cameras.

Although the E-1 was designed from a clean sheet with no 35mm lens baggage, a camera is a camera is a camera, and from a design point of view there are no massive leaps to be made. The result is the E-1 looks similar to 35mm-derived DSLR bodies.

Finish:

Crinkled black on metal, rubberized grip and thumb area

Same here. The feel of the camera is better than that of the Canon D10 or D20, and much better than that of the Nikon D100 or D70.

John: The E-1 has been constructed to the highest standards, to satisfy the original target customer, the professional photographer. As it turns out and just like the famed OM system its main customers seem to be dedicated advanced amateurs; the only distinction I'm drawing here is that for advanced amateur use it is maybe a tad over-engineered. (Just a hindsight comment.)

This does not mean E-1 is not being used by pros, it is; but not as many as Olympus would like. The standard of construction in many ways matches the considerably more expensive flagship offerings from Canon and Nikon, and is superior to its supposed target competition – mid range DSLR.

Weatherproofing:

Yes

Gaskets and seals everywhere, pro grade.

John: Not weatherproof in the general sense, but meets industry standards for drip- and dust-proof. When I removed the viewing eyepiece for cleaning, I could see how careful Olympus is in making the camera D&D proof: even the bayonet-type eyepiece connection is sealed.

Size (WxHxD):

141×104×81 mm

Compare this to the E-20: 129×104 mm (WH) — just 12 mm wider. Again, the "transition" cameras are generally larger.

As compared to film-derived digital SLRs, the E-1 has another advantage: the strongly asymmetric shape. If your nose is of average size or more, you will find Olympus easier to use; with the other models you'll be sticking your proboscis into the monitor screen all the time.

John: Though I've not used the E-10 or E-20, I have handled them, and the finish on the E-1 seems of a higher quality, less "plasticky". Its heft, weight and ergonomics inspire confidence. For sure, this, as its predecessors is no toy.

The asymmetrical shape gives space exactly where needed, Plenty of room between grip and lens; for example, for stubby fingers. The lens mount is placed well out to the side of the body making the lens sit nicely in your left hand. It is smaller than the main rivals but above all it falls to your hands; design kudos.

Weight:
  • 665 g (23.5 oz) body
  • 1100 g (38.8 oz) with the 14-54 mm lens
This does not include the batteries. Almost identical to the E-20, which weighs 1050 g (37 oz) with the built-in lens.

John: The BML-1 Battery adds an additional 75 grams (3 oz.).

The competing SLRs, based on bodies adapted from film cameras, weigh more (data w/o lens): Canon E-10 at 875 g, Nikon D100 at 780 g or D1X at 1200 g, Fuji S2 at 850g, this in spite of the fact that the E-1 seems to be sturdier, in addition to being weatherproof.

Index

Lenses

Interchangeable lenses:

Yes

Most people who say "I wish this camera had interchangeable lenses" do not see the other side of the bargain: CCD pollution. Dust tends to stick to the CCD surface (or to the front of the low-pass filter in front of it). There is a whole industry of contraptions designed to remove the specks (sticky swabs, brushes, whatever), and when you see the problem you may think that the fixed lens in the E-10/E-20 was not such a bad idea after all.

Olympus addressed the problem with a system where the IR-blocking filter is submitted to ultrasonic vibrations, supposed to shake off the dust which then will, or at least has a chance to, be caught by a sticky tape. This probably is a piezoquartz device, and the cycle is activated every time when the camera is turned on. The solutions seems to be quite effective.

John: True; I don't know the technicalities of how it works, but it is very effective.

The camera is supposed to be in the normal upright position when switching on — something I occasionally forget.

Olympus says the device will remove most dust and dirt, and in addition the detailed, CD-based handbook devotes a section to do-it-yourself CCD cleaning, with appropriate warnings. I've had no need to undertake this yet. No evidence of dust from the standard blue sky test.

Three Digital Zuiko lenses were available at the camera introduction; as of this update (November, 2004), seven are available from Olympus, three from Sigma, and a super-wide 7-14 mm from Olympus should hit the shelves in 2005 (start saving money now; this one will not be cheap!).

A full list with basic details can be found here.

Mount type:

The 4/3 standard

This is an open standard announced by Olympus together with Kodak last year, an attempt to provide interchangeability between various makers' lenses and cameras. Obviously, the standard includes mechanical lens-camera connection, the flange-to-image distance, but also the communication protocol between the lens and camera (see below).

Fuji's participation in the standard is so far limited to verbal declarations; Sigma joined the bandwagon with three lenses so far, promising more. I am skeptical about any other major manufacturers (Canon, Nikon) building 4/3 bodies: they seem to be committed to APS-sized sensors, and they have all a long history of selling lenses with a proprietary mount to captive audiences.

Mount size:

46 mm (internal diameter)

This is large, even in 35-mm camera terms. The first 35-mm SLR, the Exakta (1938-1972), had a bayonet with 39 mm internal diameter, and the most popular mount in history, M42 (Praktica/Pentax), had a 42 mm thread.

John: The mount is the same size as the Olympus OM one. In fact the OM bayonet flanges have been altered only marginally, probably to prevent direct mounting of OM lenses.

Now, remember that the 4/3 format frame has the width of just 18 mm, compared to 36 mm for the film, and you will see why I'm surprised. Relatively, the mount throat is twice as wide in the 4/3 standard than in 35-mm film cameras. The relative film-to-flange distance is also considerably larger.

This obliterates most of the claimed size advantage of the 4/3 lenses over ones inherited from film cameras, at least for focal lengths from wide angle to moderate tele. Except for the 300 mm (600 mm EFL), all announced Olympus lenses are roughly the same size as their 35-mm equivalents of the same EFL (effective focal length).

John: Zuiko Digital lenses are bulkier but shorter than the OM Zuikos of comparable angle.

There were good reasons for all this, mostly the need for smaller incident angles of light reaching the CCD. Smaller incident angles significantly improve the quality of the CCD response, wise people say. (The difference will really matter, I think, for wider lenses, but not as much as the focal length would indicate, because in 25-mm SLRs these have to follow the "inverted telephoto" design to accommodate the mirror anyway.)

John: It seems to make sense as the CCD has more of a 3-D surface than film.

Control coupling:

Electronic

Having no lens legacy ballast, Olympus can afford this approach. All data and control is transferred between the body and the lens electronically — more accurate and reliable than mechanical transfer.

In addition to obvious items, like aperture, focal length, and focus, there are some new ones, seen never before. According to Olympus, some lenses transfer the information about their optical distortion (an optical flaw where the lens magnification depends on the distance from its axis, causing the well-known barrel or pincushion effects) or about image fall-off (getting darker off-axis). This information is then embedded in the raw image data, then used either in-camera or in postprocessing to remove the effect.

John: With E-1, this can be done in Olympus Studio, but not in Olympus Viewer, included with the camera. I am unfamiliar with the former, as I'm not prepared to pay a further £100 for the full version. My apologies.

Index

Image sensor

Sensor type:

Full Frame Transfer CCD: KAF-5101CE by Kodak

While in older CCDs some of the sensor area between photosites is not light-sensitive (used for charge-reading circuitry), in this type there is almost no such loss: the photosites fill most of the chip.

These changes result in greater light sensitivity, lower noise levels, greater dynamic range, and less interaction between neighboring photosites (blooming). Of course, it remains to be proven if and how these potential advantages are translated into image quality improvement. As they say in the U.S., there are many ways to suck an egg.

In all other aspects this seems to be a "classic" CCD array, like ones used in most digital cameras in the last few years, with a mosaic of RGB filters in front of photosites (other solutions include, at this moment, a CMOS array used in some Canon and Nikon SLRs, a four-color filter recently introduced by Sony, and the Foveon sensor, with each photosite responding to all three primary colors). Clearly, Olympus has chosen the most proven approach here, although in the best possible implementation.

Effective sensor size:

17.3×13.0 mm

The often quoted size of 18×13.5 mm refers to the gross size, including parts of the sensor array not outside of the image area. Horizontally, this is a bit less than half of the 35-mm frame width. Compared with the E-20, the sensor is twice as large (linear), with four times the area.

Obviously, this leads to greater pixel pitch (spacing between pixel centers, horizontal and vertical). Combined with larger relative photosite size (see above), this opens a potential for better images. The individual photosite size in this chip is 6.9x6.9 microns.

The sensor size affects the effective depth of field. According to the N times F rule, shooting with the E-1 at some aperture (F-number) is equivalent, in terms of DOF, to shooting with a 35-mm film SLR with the F-number doubled. (I am assuming that the angle of view is identical in both cases.) This means that while DOF is significantly greater than for a film camera, it is still possible to blur the background as desired in some applications.

Pixel count:

Nominal 5 megapixels, or 4.69 "binary" MP

The stored image (in full resolution) consists of 1920*2560 = 4915200 pixels. In computer applications the "mega" prefix does not mean one million, like in the metric system, but 2^20 (2 to the power of 20), i.e., 1048576. Therefore in my book the E-1 resolution is 4.6875 megapixels.

Camera manufacturers prefer to use the metric definition of "mega": 5MP looks better on paper than 4.7 MP.

John: It may seem that camera makers are beginning to admit that 4-6 MP is sufficient to match 35mm film. Or perhaps the public is, at last, seeing the megapixel race for what it truly is — commercial exploitation.

Native image size:

1920×2560 pixels

Olympus chose to stick to the "digital standard" 3:4 ratio, as opposed to the 35-mm frame, 2:3 proportions. I think this was the right decision. The 3:4 ratio is generally more pleasing and better fits most of the standard enlargement sizes. The "purists" who stick to the 2:3 ratio tend to forget that it was a result of an accident: when Mr. Barnack built the first Leica back in 1913, he used two 3:4, movie-standard frames side-by-side. 3:4 is a return to the original ratio defined in view cameras.

John: The 3:4 aspect ratio is for me absolutely correct. 2:3 (the 35-mm letterbox size) inevitably needs to be cropped to achieve an aesthetically pleasing print that normally ends up near 3:4 in any case. Check it for yourself from your own cropped and printed images; 75% of mine come out at an unplanned 4:3.

Cameras using the 3:4 ratio make a better use of the pixel count. For most standard print sizes (except of the smallest, 4x6"), the proportions are close to 3:4, not to 2:3. Cropping an APS-sized frame to these proportions leads to 11% of pixels being just thrown away; suddenly your 6MP camera turns out to be really a 5.3 MP one.

Some people complain that the E-1 has "only" five megapixels, and not the 6MP of some of competing models with APS-sized sensors. Let's check the numbers, for a moment neglecting any factors other than pixel count: for example, Nikon D70 produces images 2000x3008 pixels (why the extra eight?). When printed in the 3:4 aspect, it gets an advantage of just 80 pixels vertically and 107 horizontally, 4% in each direction; 341 vertical rows of pixels (or almost 0.7 MP) are just thrown away. Yes, you can get bigger prints from the Nikon, by a whopping 4%. Go figure.

Color depth:

12 bits per RGB component

This means extending the dynamic range of previous Olympus cameras (10 bits per color) by a factor of 4×, offering a capacity to preserve detail in highlights and shadows to a much larger degree. How it is utilized, depends on the process of converting the raw image into the 8 bits/color format (JPEG, TIFF, whatever), whether done in-camera or in postprocessing from an ORF file.
Sensitivity:

  • Auto: ISO 100-400
  • Manual: ISO 100-3200
The manual settings of ISO 1600 and 3200 are available only if this option is enabled from the system menu; otherwise you can go only up to ISO 800. While the manual does not elaborate on this, I suspect that speeds of ISO 1600 and 3200 are achieved not by increasing the CCD gain, but somehow at the image processing stage.

Interestingly there are no longer any settings below ISO 100; this is a more sensitive chip.

The images I've seen at ISO 1600 are quite noisy. What would you expect?

Index

Image processing

White balance:

  • Auto
  • 12 presets
  • 4 reference settings
The presets range from 3000K (incandescent) to 7500K (open shade).

What I like most is the reference setting, where you point the camera at a white (or gray) card, which you want to have rendered as neutral. This feature was first introduced in the E-10 (where it was very flaky, not really useful), and then refined in the C-5050Z and C-5060WZ, where it works really well, giving me most pleasing results. (Actually this seems to be the only way to get the WB right with low-power incandescent bulbs, below 3000K.)

In the E-1, you can save up to four such settings independently, to be later recalled.

John: Auto WB is beautifully implemented. Override or adjustment is hardly ever needed.

WB adjustment:

±7 steps in 20K increments

These adjustments can be applied individually to any of the presets (including auto and user-defined ones), and will be recalled when that preset is used. This way you can, indeed, customize the entire WB system in the E-1.
WB bracketing:

Three frames, 50K, 100K, or 150K apart

This is a nice-looking feature, but I don't think I'll have a use for it: this adjustment is easy to apply in postprocessing.

The camera does not actually make three exposures here, but just saves three RGB files with different WB applied. Obviously, the feature is disabled when the raw file format is used.

WB sensors:

Internal and external

The additional, external sensor is not common in digital cameras. It is useful in deciding whether the image is, say, predominantly red because the subject is red, or because the incident light is shifted towards that color. Obviously, in the latter case the camera should apply color correction, while in the former it shouldn't.
Noise reduction:

Yes, both fixed and random

Unless you are familiar with the difference (and even then), refer to my noise article first.

The fixed-pattern noise is reduced (and hot pixels effectively removed) by dark frame subtraction, a traditional and proven way to do it. Note that this, while removing the fixed noise, increases the random noise by about 40% (Olympus cannot just change laws of physics), so the reduction should be (and is) applied only at long exposures, where the fixed noise prevails. This usually means exposures of 2 seconds or longer.

The random noise is addressed by algorithmic filters, weighted-averaging the signal from neighboring pixels. While the process is quite smart (the degree varies with direction and depends on the local detail), it may lead to surprises, filtering out not just noise but also image detail. I've seen cameras, praised for low noise levels, which were quite notorious in this aspect. I have also used a (very good) stand-alone noise-removal program with quite good results (noise removed without contour sharpness degradation), until once it successfully removed all shingles from a roof.

This is why I think the random-pattern noise removal should be a defeatable feature. Olympus agrees, and in the E-1 you can turn it off. (When on, it also slows image processing.) If you are saving images in raw format, you can always turn noise filtering on during the image conversion.

John: Noise reduction is not available for sequence shooting. The image processing time increases by fifteen times if this feature is active. I recommend to keep it off, to be applied later on a PC.

Color space:
  • sRGB
  • Adobe RGB
This setting defines how the whole color gamut is represented by a mixture of three basic components.

Adobe RGB is can be useful if you prepare your pictures for print using the Adobe color management in PhotoShop. I haven't found much use for it yet.

Image adjustment:
  • Saturation
  • Sharpness
  • Contrast
These are the expected adjustments, performed during conversion of the raw image into the RGB format (JPEG or TIFF). The contrast can be adjusted from -2 to +2 steps, and sharpness — from -3 to +3.

The good news is that the default (zero) sharpness setting does not seem to cause any visible artifacts, notorious in some (especially less advanced) cameras, but this is what I expected.

Overall color saturation is adjusted in five steps; additionally, there are three separate settings to individually boost reds, greens, or blues, and a skin tone preset.

Lens correction:
  • Light fall-off
  • Geometric distortion
Now, this is something only Olympus can offer. The Four Thirds lenses, in addition to the usual data, provide the camera with their characteristics regarding these two flaws, especially hard to avoid at short focal lengths.

The camera then may use that data to correct the image. For light fall-off (Olympus refers to it as "lens shading") this is probably done by applying a multiplicative correction to pixel brightness; the correction can be turned on or off from the menu (it is meaningful, anyway, only for wide lens angles). Correction for geometric distortion — has to be done by mapping the light estimate for a given photosite to a different pixel (as strange as it may look, there is nothing wrong about it; translation into RGB involves interpolation of photosites into pixels anyway, and it is really not important, where we place the resulting pixel).

The second (geometric) correction occurs in postprocessing only.

John: The lens shading correction increases the processing time by a factor of eight. Again, I recommend to turn it off and apply in postprocessing.

Image formats:
  • ORF (Olympus Raw Format)
  • JPEG
  • TIFF
The raw format retains all the original information as captured, without any processing applied. All that processing can be added (and tweaked) later, when the image is converted into RGB using the Olympus software. In particular, you retain all 12 bits per color of dynamic range. This way, ORF files can be treated as "digital negatives".

This, however, requires some extra work on photographer's part. (Well, remember, we used to do darkroom work before!) In practice, high-quality JPEGs provide you with images good enough for great majority of applications, except most critical ones. Your choice.

John: The E-1 has the ability to simultaneously capture ORF and JPG files. This is useful for fast reviewing and comes with no visible impact on performance or storage. If you are shooting raw, it makes sense to have this feature switched on.

Index

Storage

Storage medium:

Compact Flash Type I or II

In the E-1 Olympus dropped the dual-slot feature we used and liked so much in some previous Olympus cameras. While not an essential feature, it was a reassuring thing to have, albeit at the expense of some extra bulk.

The camera recognizes the FAT32 file system, therefore allowing for cards larger than 2 GB.

While the Microdrive is supported, it makes no sense to use that format, less reliable than solid-state storage. You can buy a 1GB CF card for less than $100 now.

John: I'm not missing the dual slot feature. The xD cannot compete with CF in terms of capacity or speed. As a C-5050 user I appreciate its multi-slot capability, but once you've used a high-speed CF, there’s no going back. Also, xD cards are too small and fiddle for big hairy pro’s to use!

Uploading interfaces:

USB 1.1 and FireWire

Olympus refers to it as "Full Speed USB 2.0", which, surprise!, is not really USB 2.0 but the older, slower USB 1.1 (this confusing naming is generally used in the industry).

The older USB 1.1 handles 12 Mb/s; USB 2.0 — up to 480 Mb/s (Mb is a megabit, not a megabyte, abbreviated as MB). This does not really matter, as fastest cameras on the market (including this one) can pump no more than 3 Mb/s into the connection.

John: Of course much depends on how you chose to transfer your images. Personally I loathe connecting my precious electronic cameras to my PC. The thought of experiencing a power surge or failure fills me with horror. So, like many others I prefer to use a USB card reader. This way all I risk losing is my card and, of course, the images (and have done).

However, the interface is important for firmware upgrades of the E-system body, lenses, and flash: this has to be done when the camera is connected to a computer via USB.

Index

Viewing system

Optical viewing:

Eye-level, prism finder

The E-1 uses a viewing system very much like that of a film-based SLR. There is a swinging mirror in the light path, so that in the viewing phase the image is created on a magnifying groundglass, and then viewed through an inverting, mirrored pentaprism.

This is a departure from the more unorthodox solution which was used in the E-10 and E-20, where instead of a swinging mirror, a static, semi-transparent one was used to split the light into two parts: reflected (forming the finder image on the groundglass), and the one going straight through to the CCD imager.

The moving mirror of the E-1 has an obvious advantage of providing a brighter image both in the finder and on the CCD — but not at the same time! The CCD is not used at all during the view phase, and there is a blackout in the viewfinder when the frame is being exposed. This means you cannot use the LCD monitor for live preview of the scene, only for viewing of pictures already taken.

The pentaprism used in the E-10, as opposed to the mirror system used in less expensive cameras (including the Canon Digital Rebel 300D), provides a brighter viewing image at the expense of additional weight and cost.

John: In a straight contest, there is no comparison between the screens on the E-1 and OM. After using the E-1, and then picking up a late OM, especially with a Series 2 screen, the difference is so acute it’s like suddenly seeing everything in Cinemascope. Still, the E-1 screen is somehow sharper and clearer; it is just as easy to use, even though it’s not as big or bright.

Focusing screens:

Interchangeable

For serious users this is a valuable feature. The standard FS-1 screen supplied with the camera is a high-tech kind, bright yet allowing for precise focusing. From descriptions it looks much like the famous Acute-Matte type by Minolta, which was the best I knew, although I was not able to make a side-by-side brightness comparison.

At this moment, one additional screen was announced.

Depth-of-field preview:

Yes, with a button at the front of the camera

Some people need it, some will never use it. With the smaller viewer image and greater DOF of the Four Thirds format (as compared to 35-mm film), I consider this feature less essential than in 35-mm photography.

John: On this I disagree. This is one reason I went SLR all those years ago. Gone are the days of calculating DOF. Look through the viewfinder, press the DOF preview button, and you can see what’s in focus and what’s not. To me the DSLR’s inherently greater DOF means this feature is more important, not less. Using a shallow DOF to accentuate the subject from its background is imperative and the amount of blur is critical in doing so.

Coverage:

100%

Serious.

John: From my experience it appears to be a genuine 100%.

Image magnification:

Nominally 100% at focal length of 50 mm, focused at infinity

For 35-mm SLRs image magnification is usually given at F=50 mm. Using the same length for the E-1 is somewhat misleading; instead 25 mm (50 mm EFL) should be used. For this focal length, the image magnification is 50%.

A good film SLR will have an 86% magnification, cheaper ones may go down to 70%.

All this means that a scene image viewed through the E-1 finder is about 58% of the size viewed by a good 35 mm SLR at the same lens angle; not really impressive. On the other hand, digital SLRs with APS-sized sensors perform here exactly like the E-1. (Actually, most of the old time SLRs used to provide 100% viewing size at f = 58 mm).

Diopter adjustment:

From -3 to +1 diopters

Important: remember that most of the buyers will be us, middle-aged men...

John: This adjustment is easily performed but once set, it cannot be mechanically locked. The adjustment button rather small and located on the flat of the viewfinder, so accidental movement is unlikely, but still.

Finder information:
  • Autofocus point, lock, confirm
  • Exposure level and compensation
  • Exposure and metering modes
  • Shutter speed and aperture
  • AE lock and bracketing indicators
  • Flash mode and confirmation
  • No. of sequential frames left
  • White balance override
Quite comprehensive, providing more information than that available in the E-10/E-20.

John: Most film SLR users will be very comfortable with E-1 finder information. It is clearly laid out, logical, comprehensive, yet not overwhelming. The green read-out is easy to absorb and my only complaint is that it switches off after 8 seconds of lifting your finger from the half-depressed shutter button. With a high-capacity battery on-board I would have thought twice the display time would be readily achievable.

Other features:
  • Eyepiece shutter
  • Interchangeable eyecups
The eyepiece shutter is important in time and/or remote-controlled exposures, while interchangeable eyecups (with one extra model available) are nice to have.

John: Both are useful features, and I have ordered an Eyecup 2.

Index

Shutter

Type:

Focal plane, electronic control.

The shutter is similar to those in most film SLRs. While most users are familiar with this type and take it for granted in SLR cameras, not everyone realizes that this is rather a solution of necessity, not of choice. Still, we've got used to focal-plane in the last eighty years of film cameras to the point that we no longer see their disadvantages.

One often-overlooked disadvantage of these shutters in digital cameras is, again, the dust spillage (metal particles or lubricant) on the CCD.

The E-10 and E-20, with their fixed lenses, had leaf shutters. This was a deliberate decision on part of Olympus designers, not a whim.

Speeds:
  • 2s-1/4000s in program and aperture priority modes
  • 60s-1/4000s in manual and shutter priority
  • manually timed (bulb) up to 8 minutes
This is a good range, and the inclusion of 60s at the low end seems to indicate the maker's confidence in low-light capabilities of the camera.

Some film-based SLRs go up to 1/8000s or even higher; we have to note, however, that, because of the frame size difference, at 1/4000s the shutter slit width in the E-1 is the same as at 1/8000s in a 35-mm film SLR. I believe that 1/4000s is as high as you can go without incurring the extra cost of narrowing the slit while keeping its size accurate. (My calculations indicate that the minimum slit width in the E-1 is just 0.8 mm.)

Max. flash synch speed:

1/180 s

This is the speed at which the second shutter curtain begins to close only after the first one gets fully open, therefore creating a short period when the whole imager is exposed to the light at the same instant. Therefore if a typical (short-burst) electronic flash fires at that precise moment, the whole frame will be exposed.

Some dedicated flashes (including the new FL-50 by Olympus) can also be synched at shorter speeds, see the Flash section below.

Release:

Soft-touch, electronic

The release is as soft and precise as in the older E-10/E-20 cameras. This makes a difference at handheld, longer exposures.

John: In use, the shutter release is a joy. For such a simple function it makes you wonder why other manufacturers cannot get it right.

Index

Drive modes

Modes available:

Single, sequential

As expected.

For each of these modes you can independently set the way in which shutter release operates, as mentioned in the autofocus section.

Sequential rate:

3 frames per second (FPS)

This is respectable for a digital camera, especially when available in all image file formats, including Raw+JPEG stored at the same time.
Buffer capacity:

128 MB

This is about 12 uncompressed frames; for JPEGs the number will vary, depending on compression.
Self-timer:

2 or 12 seconds

Just fine.
Remote control:

Optional, wired or infrared

The E-1 accepts the RB-CB1 wired remote used by some previous Olympus cameras. The remote socket still has the screw-on cap, cumbersome to remove and easy to lose.

Two existing Olympus infrared remotes can also be used: RM-1 or RM-2, and the camera can be set to a 2-second delay or no delay at all.

John: The second option gives you almost instantaneous release: the delay is less than half a second. RM-1 is a must for table-top or tripod photography. It is also useful if using legacy macro/micro stand equipment as the signal can be bounced.

The remote used to be included with the camera (at least on the U.S. market), but not any longer. It has to be purchased separately for $30 or so, quite steep for a gadget it takes $1 to manufacture.

John: Same in U.K. — RM-1 can be bought for £15.00.

Mirror lockup:

Yes, 1..30 s

The mirror goes up at the selected time before exposure, therefore preventing camera shake at critical applications.

Index

Exposure control

Light metering system:

Through-the-lens, full-aperture

While Olympus still refers to the system as "Electro-Sensitive Pattern" (ESP), which means close to nothing, this system is entirely different than the "ESP" used in their previous Camedia E-series and D-series models.

In those cameras the CCD itself was used to measure the light, as it was being exposed continuously during the pre-shot phase. In the E-1, however, the CCD does not receive any light before the picture is taken, so the light metering must be performed by a separate set of sensors.

John: The E-1 light meter is positioned adjacent to the prism, thus reading light off the focusing screen. The sensor on the bottom of the camera just behind the bottom of the mirror is for AF purposes only (I originally thought it may be for both AF sensor and light meter). The E-1 meters continuously until half-pressing the shutter button locks the exposure.

Metering modes:
  • Multi-pattern
  • Center-weighted
  • Spot
According to Olympus, the center-weighted coverage is about 60% and spot — 2%. I would assume the percentages are in terms of frame area, not the linear size.

Anyway, having the choice of three modes will be appreciated by many; especially spot metering is a powerful tool when properly used.

John: In odd lighting situations, I switch between ESP and CW and consult the monitor to give me the best result. For general use I go with the factory setting, i.e. ESP.

Metering range (at ISO 100):
  • Matrix and center-weighted: EV 1-20
  • Spot: EV 3-17
Some sources (including Olympus) erroneously list the metering range as EV 3-20 in all modes.

Now, what do the numbers mean. The value of EV 0 corresponds to the exposure of 1 second at F/1.0 (easy to remember), therefore the E-1 specs of EV 1 at the low end may be understood as 4 s at F/2.8. This is a value typical for a mid-range, modern film SLR; not too bad, but not really impressive. Judging, however, from my past experience with Olympus cameras, I expect the published specs to be on the conservative side.

The high end of EV 20 is more than enough for any applications.

John: The metering is also conservative: The E-1 has a propensity to under-expose by around 2/3 EV as a rule, presumably to protect the highlights. This was confirmed when I talked to Olympus Europe.

Exposure control modes:
  • Program (shiftable),
  • Aperture priority,
  • Shutter priority,
  • Metered manual,
  • Time exposures (bulb).
This is what we would expect, but the addition of program shift (where you can move the shutter and aperture settings in a desired direction without affecting the total exposure) is a nice touch.

John: It’s a very nice touch, as while in the program mode the user can shift either way as needed to control DOF or movement without having to switch to aperture- or shutter priority.

I tend to use my C5050 in aperture priority, but the E-1 tends to stay in program because of this added flexibility.

Specialized programs:

None

Advanced users will not be missing these (portrait, landscape, etc.), they usually know what they are doing, and they want to know. Not on a pro camera.
Exposure compensation:
  • Range from -5 to +5 EV
  • Steps of 1/3, 1/2, or 1 EV
The wide range may be sometimes useful, while the variable step is rather a matter of accommodating various users' working habits.

John: This is handy when working with OM lenses or slave flash units, when overexposure may be an issue. However, I don't think I've ever been past 4EV.

Exposure bracketing:

Three or five frames in steps of 1/3, 1/2, or 1 EV.

Nice and flexible.

John: Indeed, bracketing is a wonderful tool and in the E-1 it is implemented well.

Index

Focusing

Autofocus:

Passive TTL, phase-detection

The system is very similar to that used in film SLRs. It does not use the imager for autofocusing (as many digital cameras do); instead, some light passes through semi-transparent parts of the mirror, and gets redirected (with use of a secondary mirror) to the bottom of the camera, where dedicated light sensors do the job.

Previous Olympus (and most other) cameras were using the contrast-detection system. The phase-detection may be better, as it measures both the direction and magnitude of the required focus adjustment; this should make the system faster and more accurate.

John: Coming from OM SLRs, I have little experience with autofocus. To me the E-1 AF system is fast, accurate and quiet. It more than copes with my shooting needs. Whether I'd say that if I were a sports photographer, I simply don't know.

Autofocus lock:

Yes

This is usually done by half-pressing the release button.

Additionally, the AE Lock button in the back can be set to hold either autoexposure, or focus, or both.

AF release lock:
  • Focus priority
  • Release priority
The shutter action may be prevented if the autofocus has not been achieved — this is referred as focus priority mode, as opposed to the release priority mode, where the shutter will fire regardless of whether the camera was able to focus properly.

The choice between these two modes is done from the settings menu, separately for the single and continuous drive modes. This makes sense, as in the single drive mode my preference is usually for focus priority, while in the continuous mode — for release priority.

John: You should have written the Olympus manual, where this section is almost incomprehensible.

AF assist beam:

Yes

This should help in low light, at moderate distances.

Index

Flash

Internal:

None

Some users may complain about this design decision, but I can see the reasons behind it.

While a built-in flash is never good enough for any serious applications (and this is supposed to be a professional-grade camera), it may be convenient as a last-resort emergency solution, or, sometimes, as a fill-in in a bright sunlight.

On the other hand, it makes the prism housing construction less robust (and larger). Additionally, I believe that weather-proofing the flash (and its connections to the rest of the camera body) to the same extent as the rest of the camera would, if at all possible, cause additional design issues.

John: This issue has raised a disproportionate debate. The reason no flash was fitted to the E-1 was that it compromised the dust/drip proofing. Olympus decided that this was more important than a piddling flash that, if they had fitted one, would be criticized for not being powerful enough. As a user, I'm not bothered by the lack of a built-in flash . A pro will use a bounce, multi-position, zoom-head flash anyway.

External connections:
  • Olympus dedicated hot shoe;
  • Standard (non-dedicated) PC socket.
The use of a standard PC socket as opposed to the multi-pin, Olympus-specific connector is a nod in the direction of professional users who may have an existing investment in third-party flashes.

To use a dedicated Olympus flash off-camera (i.e., not on the hot shoe) you will have to get an Olympus flash bracket and a special hot-shoe extension cable, each at $60-$80 or so. Still, I consider this choice better than the dedicated socket present in previous Olympus models (E-20).

Flash modes:
  • Auto (on demand)
  • Auto + red-eye burst
  • Manual
  • Slow (1st curtain)
  • Slow (2nd curtain)
  • Fill
  • Off
First- and second curtain synchronization determines whether the motion streaks (image created by the ambient light) precede or follow the frozen part of the image (created by flash burst).

Flash compensation:

From -2 to +2 EV in 1/3 EV steps

This adjustment is applied in addition to (and not instead of) the overall exposure compensation. It can therefore be used to adjust the ratio of flash to ambient light.
Max. flash synch speed:

1/180 s

This is the fastest speed available with a single-burst flash. Some of the dedicated Olympus flash units (FL-50, the new FL-36) can also provide synchronization at faster speeds.

This is done by emitting a series of short light bursts, which cover, for all practical purposes, uniformly the 1/180 s time interval during which the shutter slit is traveling across the film frame. A downside is that the effective guide number of your flash will be significantly lower than in the normal mode, when the whole frame is exposed to the flash at the same moment.

Index

Power

Basic power source:

BLM-1 Li-Ion battery

Some people will be happy with the lithium-ion battery, some will not.

The previous E-10 and E-20 used four generic AA batteries (Ni-MH or other). In case of emergency, you could just pop in four alkalines available at every street corner — these would last shorter, but they would still do the job. If your proprietary battery pack goes dead, and if you do not have a spare along, your E-1 will be as good as a brick in terms of picture-taking capability.

John: While NiMH rechargeables might have been our preferred choice, I can see why Olympus chose differently. This is a pro camera. It is easier and safer to carry around one spare BLM-1 than four AA’s, and the reinstall time is far quicker.

Capacity:

10.8 watt-hours, i.e., 1500 mAh at 7.2V

Usually the main reason to use proprietary lithium-ion batteries is greater capacity. Let us check the numbers. The BLM-1 stores 1500*7.2 = 10800 mWh of energy. A set of four NiMH AA's of a recent (2300mAh) vintage will have 2300*4.8 = 11040 mWh, and these units are improving every few months.

Comparing the capacity of Li-0Ion batteries to NiMH ones may be a bit misleading. When a NiMH is discharged, its internal resistance climbs up, and therefore the voltage on battery terminals drops; the camera may refuse to work before the battery is actually out of juice. Li-Ion batteries keep the internal resistance (and therefore external voltage) more steady.

The BLM-1 battery (imagine two AAs side by side) seems similar to some other models, including the BP-511 by Canon, but the contacts are placed differently, so that batteries are not mutually compatible.

John: THird-party BLM-1’s are readily available for a tenth of the price of the Olympus ones, but beware, some of these "Chinese cheapies" may so poorly constructed they pose a danger to you and your camera. Olympus has warned BLM-1 users that substitution of non-Olympus batteries will nullify warranty.

Charger:

BCM-1, included

This is a proprietary charger, and it comes with the camera. The fast charge time is two hours.

John: A full charge time seems to be 2.5-3 hours. Partially charged units can be topped up in about 45~60 minutes.

Obviously, if you travel with a backup camera using a different battery type, you will have to carry both chargers.

Additional power source:

BLL-1 Li-Ion battery pack (in the optional HLD-2 power grip)

This grip/battery combination sells separately, adding a pound or so to the total weight (and, including the battery, $500 to the cost). The battery has a capacity of 3400 mAh, more than double of the standard one. Some users will like the grip functionality, changing the camera weight balance and providing duplicate controls (control wheel and shutter release).

I consider the power grip a waste of money for most users. The extra weight is not something I want to carry along (a spare BLM-1 will do), and the body ergonomics is good enough as it is.

And, obviously, if you go for this power source, you will have to travel with yet another battery charger; quite inconvenient.

John: This is one stupid idea for which I don't have an explanation, plausible or otherwise. As for the grip itself, I know several users who are delighted with the extra charge available and with more comfortable handling it provides in the portrait orientation. For me, the grip just too big and numb.

AC power:

Via the AC-1 power adapter

The adapter works with voltages from 100 to 240 V. The power socket in the camera is proprietary, so this is the only adapter you can use.

Index

Image playback

Monitor type and size:
  • Liquid crystal, color TFT
  • 1.8" (46 mm) diagonal
  • 135,000 pixels
The size and resolution of the TFT monitor are typical for digital SLRs.

The monitor pixel count (about 320x425 resolution) is OK, but I wouldn't mind a higher one.

The monitor pixel count, as given by Olympus, follows the misleading convention also used by all other manufacturers: these are not really pixels, but rather individual red, green, or blue "1/3-pixels". What is specified as a 135 kPix display is really rather a 45 kPix one. Still, the number is OK for comparison against other cameras, as all are guilty of the same misrepresentation.

Information shown:
  • File name and number
  • Exposure and image processing parameters
  • Brightness histogram
  • Overexposed areas
Not all of this is displayed at once. Once the playback has been activated with its dedicated button, pressing the [INFO] button (or holding it down while the wheel is being turned) toggles through six different display states.

Of these, the brightness histogram is most useful in verifying the proper exposure, although the display highlighting the saturated highlights is also nice.

Magnification:

Up to 4×

A higher magnification would be useful in checking the image sharpness. A magnification of 6x would allow for 1:1 pixel viewing.
Index display:

4, 9, or 16 frames

Typical.
Video output:

PAL and NTSC

The TV output can be switched between both standards.

Index

Controls

The user interface is mostly external (buttons and control wheels); some functions are accessible from the monitor menu.

At the moment of its introduction, the original E-10 offered what I believe was the best, most convenient set of controls available on any digital camera, regardless of price. The same set could be found on the E-20, and then, with minor changes only, on the C-5050Z and C-5060WZ optical-finder models. It seems that Olympus wisely retained most of that interface on the E-1, the only changes being small refinements.

The basic functions are assigned to two control wheels at the right side of the body, very much like in the E-10/E-20. This is done in a reasonable and logical way:

  • When one of the many settings buttons on the body is pressed, turning either wheel modifies this setting. For example, to change the color balance, press the corresponding button and turn either wheel, with the visual feedback in the top control panel. This approach is applied in a consistent manner, like in the E-10/20 or C-5050Z.
  • In the programmed exposure mode either wheel controls program shift towards smaller or larger apertures, keeping the total exposure at the metered level.
  • In shutter- and aperture-priority modes either wheel controls the corresponding setting, i.e., shutter or aperture, respectively.

The setting-access buttons do not require much getting used to. The full list includes:

  • Exposure compensation
  • ISO setting
  • Image file format and compression
  • Flash mode
  • White balance
  • Autofocus pattern
  • Metering pattern
  • Drive, self-timer, and remote mode
  • Exposure bracketing

Two more buttons work solo, i.e., without control wheels: exposure lock and control panel backlight, while focusing mode (single, continuous, or manual) is set with a separate lever.

Last but not least, the camera back hosts the menu and display activation and navigation buttons, very much like almost any model from almost any manufacturer.

All other settings, including user's preferences, are accessible from the LCD monitor menus. Those are organized in a no-nonsense manner, similar to that on the E-10/E-20, and quite unlike those on the newer Olympus C-series cameras.

Index

References

There is a number of quite detailed reviews of the E-1 posted on the Web. The ones I found most informative (although not without errors and omissions) are

  • John Foster's E-1 User Report at this site, written from the perspective of a non-technical guy in the trenches.
  • A real-life photographer's review by Phil Greenspun of photo.net will not overwhelm you with detail, focusing instead on what really counts.
  • Phil Askey's write-up at DIgital Photography Review, perhaps the most complete and detailed review available.
  • Review by Steve Jenkins at Steve's Digicams (very meaningful image samples, as Steve shoots mostly the same objects for different cameras!)
  • Review by Jeff Keller at Digital Camera Resource
  • Another one by Dave Etchells at Imaging Resource (note: most of the samples here are re-shot from prints, not real-life objects, but the text is informative).

Index


My other articles related to the Olympus E-System cameras.

Olympus® is a registered trademark of Olympus Corporation.
This page is not sponsored or endorsed by Olympus (or anyone else) and presents solely the views of the author.

Home: wrotniak.net | Search this site | Change font size

Photo News | The Gallery


Posted 2003/06/26; last updated 2009/01/10 Copyright © 2003-2009 by J. Andrzej Wrotniak