|
Olympus E-620 A Technical Review and Reference |
|
|
My other articles related to the |
|
This is a detailed, technical review of the E-620 SLR by Olympus. If you are interested in just the basic features of this camera and differences from the previous Olympus digital SLRs, refer to an While writing this article, I've used a structure very similar to that of my E-30 review. The contents, however, has been written anew, in spite of all similarities between both cameras; no copy-and-paste jobs here (with one or two exceptions, as stated). |
|
Table of Contents: | |||
|
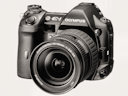
The E-620, another digital SLR from Olympus, was announced early in 2009, and hit the store shelves (U.S. and Europe at least) in May. It attracted a lot of interest — not because of any significant new features, not seen in previous Olympus models, but because it combines lots of desirable features previously introduced, bundling them in a very well-balanced and diminutive package. I've been using the E-620 since late May, and this article is a summary of my findings so far. The text is quite long and detailed, so please be patient. |
.x.jpg)
|
| (Promotional image by Olympus) | |
|
As always, I'm trying to verify any data provided by the manufacturer, raising flags at any discrepancies (or obvious goofs). I am also commenting on all specs and features: if you wanted just dry numbers and listings, you could find them at one of the Olympus sites, like, for example here. |
|
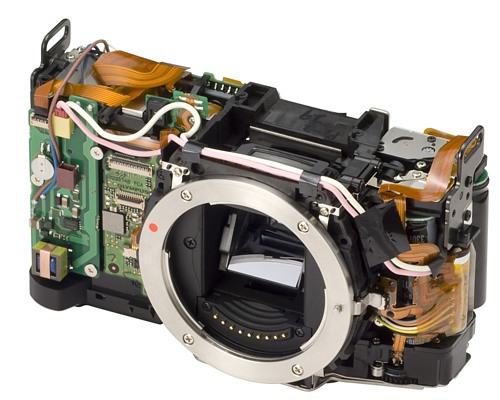
Lens mount:
Four Thirds standard
(Photo by Olympus) |
This standard defines the sensor frame size, as well as the mechanical and electronic linkage between the camera body and lenses.
At present more than 30 lenses are available in this mount; most made by Olympus, but also by Sigma and Leica/Panasonic; all of them work just fine (including autofocus) with the E-620. See the full list for details, and the lens section of my E-30 review for some additional remarks (including those on image stabilization and Live View AF compatibility). Contrary to what you may see in some uninformed reviews, lens choice and quality is the strong point of the Olympus SLR system. While the "economy" ZD (Zuiko Digital) lenses by Olympus may cut down on specs, even they deliver good images; then the mid- and high-priced offerings are often second to none. I have used the E-620 with my favorite ZD lens: the 12-60 mm F/2.8-4.0 ZD; while the combination is, obviously, quite front-heavy, once you get used to supporting it mostly by lens itself (not the body), it is quite workable, and the results, no doubt, first-class. Some photographers will prefer the (almost as good) 14-54 mm F/2.8-3.5 ZD (old or new version), less expensive and somewhat less bulky, but many will be perfectly happy to use the two lenses which are often sold with the camera (see below). |
|
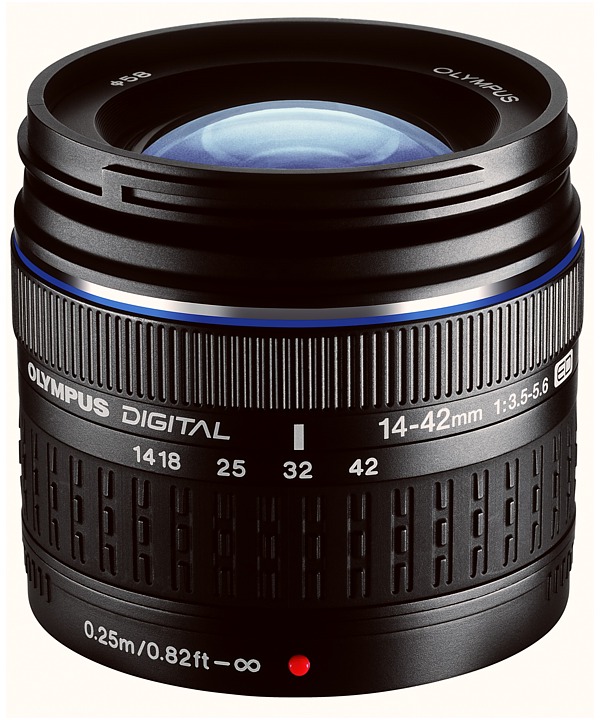
Bundled lenses:
14-42 mm F/3.5-5.6 ZD ED sometimes also 40-150 mm F/4.0-5.5 ZD ED
(Photos by Olympus) |
The bundled packages I've seen so far include either the first one or both of these "economy kit" lenses, priced at about $100 extra each.
When these lenses were introduced in the States in 2007 (with the E-510 and E-410) I wasn't, frankly, expecting much from them. They were just too small, too light, and too cheap (plastic mounts!) to be any good. After a week of using both I had to stand corrected: both turned out to be respectable performers, better than "kit" zooms from other manufacturers I've seen, and not worse than their older Olympus equivalents (which were significantly bigger and heavier). It is all too easy to dismiss these lenses as just another cheap pieces of plastic; actually, in spite of inexpensive construction (plastic mount!), they turn out to be respectable performers within their modest specifications, nothing really to complain about. The shorter zoom provides a very useful focal length range (equivalent to 28-85 mm on a 35-mm film camera), being extremely small and lightweight: just 61 mm long at 190 g. The longer one, while going to the (film-equivalent) 300 mm is only 72 mm long and weighs 220 g. This means that a full kit using an E-620 body will weigh about 940 g (just above two pounds), providing the equivalent focal length coverage of 28-300 mm, with image quality better than a film camera of just 10 years ago (not to mention any of the "superzoom" digital models. A hiker's dream. The performance of both these lenses can be seen in the E-620 image sample page, as well as in my E-510 Image Samples. |
|
Using legacy lenses:
Yes, with adapter
|
Because of having smaller backfocus distance than other SLR systems (this is the distance between lens flange and the sensor surface), Four Thirds cameras can use almost any legacy (pre-digital) SLR lenses. This requires using an adapter providing the necessary mechanical fit.
Obviously, no autofocus capability will be retained, and exposure automation will be limited to stepped-down aperture priority. Image stabilization will work just fine, as long as you enter the lens focal length manually into the camera. Details and more references can be found in another article here. |
|
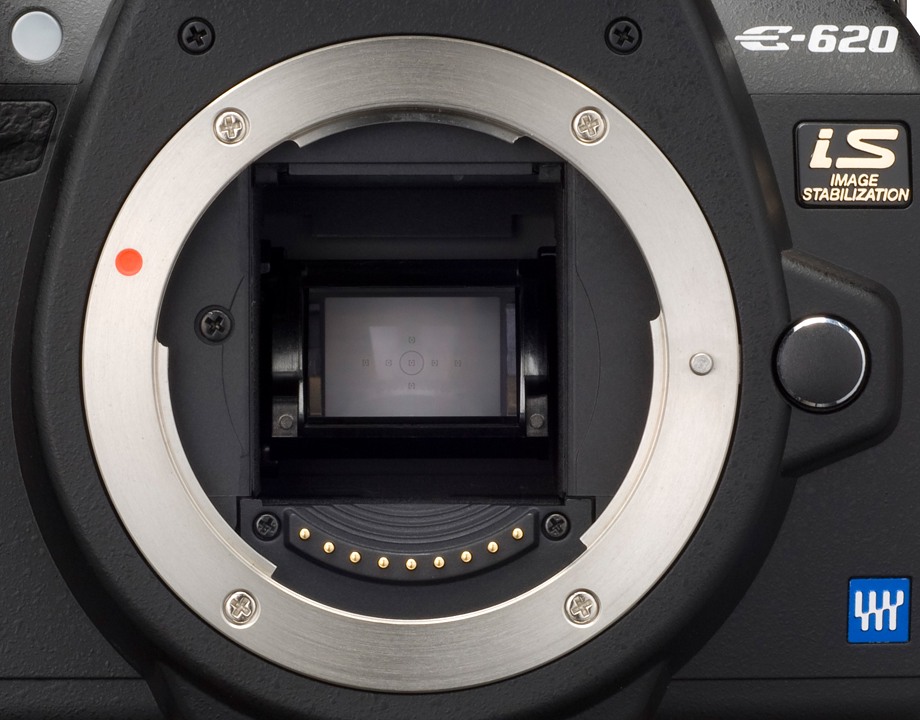
Sensor type:
Live MOS (NMOS)
(Image by Olympus) |
After a long transition, all current digital SLRs are using NMOS sensors instead of CCDs, in spite of some advantages of the latter (Nikon, I think, was the last maker completing the switch).
The E-620's sensor is made by Panasonic. None of its detailed specifications have been made public; it is generally suspected that this is the same sensor as one used in the Olympus E-30 and Panasonic G1 cameras. The results from the imaging pipeline suggest this is not the case; I suspect this is a simplified version of the original. On the other hand, a promotional picture of the imager, distributed by Olympus, not only looks identical, but, I am certain, is a differently resized version of the same original. This would suggest that the imager itself remains unchanged, but the remainder of the imaging pipeline was modified. |
|
Effective sensor size:
17.3×13.0 mm
|
This is a bit smaller than the common APS-C format used in most digital SLRs. In the vertical dimension (which counts for most of the standard print sizes), the difference is 13.8% (Canon APS-C: 14.8×22.2 mm).
The 4:3 aspect ratio, identical to that of the standard (i.e., not wide) TV screen, is different from the more elongated 3:2, used in all other digital camera brands (except Panasonic) or in 35-mm film. It is, however, identical to the aspect ratio adopted in almost all non-SLR digital cameras. While the 3:2 ratio fits exactly the most common 4×6" (10×15 cm) print size, 4:3 is closer to the proportions of almost all larger sizes. In other words, in those sizes some of the 3:2 image area gets wasted (cropped out). For more on sensor size, see here. |
|
Pixel count:
12 megapixels |
The number of photosites used in the resulting image is about 12.2 million (exactly: 12,192,768, or 11.63 "binary" megapixels).
Because every photosite captures only one color component of the image, for every pixel the remaining components are interpolated from its neighbors; the actual information captured by the camera is about one third of the nominal pixel count. This is true for all camera models and brands except Sigma, which uses the Foveon sensor, different than anybody else's; but then Sigma advertises the number of its three-layered photosites multiplied by three, to level the playing field. For more on this, see When Is a Megapixel Not a Megapixel. |
|
Native image size:
4032×3024 pixels |
This is just a tad less than the "binary" 4k×3k, which would result in exactly 12 "binary" MP.
The EXIF data (CropLeft and CropTop items) suggests that the actual photosite count is higher: 4088×3092. While the extra number is not directly translated into final pixels, some third-party raw-to-RGB converters may be able to do that, resulting in slightly (3.7%) larger pixel count, and 1.8% or so wider image angle. |
|
Color depth:
12 bits per RGB component |
In the days of pencil-and-paper data processing there was a good rule of thumb to do all internal calculations with one more decimal digit of accuracy than needed in the final result. For similar reasons I believe that 14-bit analog-to-digital conversion should deliver better final results than 12-bit one. How much better? I'm not sure.
Olympus must have decided than going from 12 to 14 bits is not worth the trouble. Nikon is also using 12 bits (D5000, D90, D300), while Canon 12 bits (1000D) or 14 bits (50D, 500D). Some cameras (Nikon?) use 12 bits in conversion itself, but 16 bits in any further calculations; once again, the benefit of this remains unknown. |
|
Capture sensitivity:
ISO 100 to 3200 | The maximum value is double that in the E-5x0 or E-4x0, or the same as in the E-3 or E-30. Don't expect any miracles at ISO 3200, though; this is for emergencies only. See also ISO Settings in Exposure Control. |
|
Infrared sensitivity:
R72 exposure factor of about 2000× (11 EV)
14-42 mm ZD, Hoya R72 filter 5 seconds at F/5.6, ISO 100 |
Like all (non-modified) digital SLRs, the E-620 is marginally usable for infrared photography, with a sunny scene requiring 2-3 seconds of exposure at F/4, ISO 100. The E-3 was showing a bit lower IR sensitivity (11.3 EV, within the ±0.5 EV error margin of my estimates), but the E-510 was about twice as sensitive to infrared (a factor of 10 EV).
This depends on the scene type and on the light; these are the numbers for my standard lake view shot in afternoon sunlight, shown at left. The same shot in visible light needed a shutter speed of The reason is that IR pollutes the color of pictures in visible light, so camera makers are doing the best to filter it out. The combined anti-alias, anti-IR filter just in front of the sensor is supposed to cut this component off. For more on IR photography refer to my article on that subject, with a number of further references. |
|
Dust removal:
Yes, ultrasonic.
|
This is done by vibrating the protective filter in front of the sensor with an ultrasonic frequency; this shakes most of the dust off, and sticky strips on the bottom of the mirror chamber are supposed to capture the particles. (The strips should be replaced every three years by Olympus service.) The system is activated when the camera is turned on (or wakes up from the sleep state), adding a slight delay to the process.
While originally dismissed by other manufacturers ("our cameras do not need that"), this system, originally introduced in the Olympus E-1 is now used in almost all digital SLRs. My five-year experience with the Olympus anti-dust system shows that it works very well, indeed, and the only study on the subject I've seen gives this manufacturer a nod in the comparison with other versions. |
|
Sensor cleaning option:
Yes |
There is a menu potion which raises the mirror and opens the shutter, exposing the protective filter in front of the sensor for cleaning, if necessary. I never needed that.
(Warning: This should be done with a fully charged battery, to avoid any accidental shutter damage!) |
Image file format:
ORF (Olympus Raw Format) files are compressed with a lossless compression scheme, each using about 13 MB of storage space. The exact file size varies, as some (low-detail) images can be compressed more efficiently.
| The advantages of saving raw image files are usually over-emphasized, especially for cameras with good built-in JPEG (raw-to-RPG conversion) engines — and that's where Olympus shines. For more, see my article on the raw format. Some writers may criticize a camera, because it "does not offer much of highlight headroom" in raw files. This is, obviously, in comparison to in-camera JPEGs, and it simply means that the in-camera JPEG conversion does a good job. This is very much like inflating a price of a product by a factor of two, and then announcing a "50% off" sale.
JPEG compression:
|
The exact compression rate will very from one picture to another, again, depending on the amount of information carried; therefore these are just average values at four various settings, as quoted by Olympus.
Again, the actually achieved compression ratios will vary from one frame to another; these are just "nominal" values provided by Olympus.
| The 1:4 compression ratio offers image quality good enough (i.e., compression artifacts insignificant enough) for most uses. With large-capacity memory cards becoming quite inexpensive, I would advocate switching to 1:2.7 and forgetting about the whole affair (unless you save raw image files, in which case the decision will be postponed to the stage of off-camera RGB conversion).
Average file size:
|
These are average values for images in full pixel size. They seem to be close to (if a bit higher than) what I've been getting.
| As we can see, an 8 GB card (you can buy a fast one for less than $100 nowadays) can hold almost 1000 Super Fine (1:2.7) JPEGs: an equivalent of more than 25 long (26-exposure) rolls of film.
Image size (pixels):
|
While this is an impressive range of choices, I would rather recommend sticking to the native (12 MP) size: you never know if a particular picture may not be worth a bigger print, you have more cropping freedom (with a good lens), you can always easily resize the image off-camera; and, last but not least, it is too easy to forget and keep shooting in lower resolution by accident.
| This is one of the few features I've never used on any camera.
Image quality presets:
|
The four JPEG presets are accessible directly from the Control Panel. Each of them is a combination of a pixel size and compression ratio, see above. Those combinations are, with some limitations, defined somewhere in the menu system, and even that is a two-tiered procedure, quite cumbersome.
| A JPEG preset consists of image size (Large, Middle [sic!], or Small) and compression (Superfine..Basic); then the meaning of Middle and Small is defined in yet another menu option (with Large hardwired to the native image size). I would think Middle preset should be rather called Medium, but Olympus stubbornly insists on the former. Looks like I still have some English to learn. Some may want to use one of the Raw+JPEG presets, most of the time depending on the JPEG version and resorting to an ORF file only if the image needs a major adjustment. I remain skeptical about the advantages of raw files, but this may be a personal choice.
|
Storage medium:
|
The camera has separate slots for these two card types, and it is quite easy to switch between them from the Control Panel.
| While the extra slot is a nice safety feature, its assignment to the xD card standard (not used any more by anyone but Olympus) is not just a questionable decision, but one totally wrong, plain and square, explainable only by a misplaced "business concern" (read: corporate greed). Let me save you my ranting on the subject, but if you would like to know more on this, see my xD-Picture Card Abomination article. Most users have learned to depend on a Compact Flash card in their shooting, keeping a 2 GB xD card in its slot — just in case.
Writing speed:
| Up to 0.68 s per raw image
This is the writing speed I've been able to achieve for a recent 8 GB SanDisk Extreme IV Compact Flash card (with an accuracy better than 0.01 s; average file size 11.6 MB). This is an effective transfer rate of 18 MB/s.
| For comparison, the E-30 was clocked at 0.42 s per frame (11.5 MB file size), and the E-510 — 0.61 s (10.1 MB). Therefore, the E-620 shows the same writing rate (in MB/s) as the E-510, or about 25% slower than the E-30. The Olympus-branded xD-Picture "M" card fared much worse in this test: 3.75 s per frame. Details on the measurement method used and on writing speeds for other cards and other Olympus SLRs can be found in my card-writing speed article, which one day will be updated to show more data points for the E-620.
Computer interface:
| High Speed USB 2.0, storage-class device
High Speed means the real USB 2.0 speed, a nominal transfer rate of 480 megabits (Mb) per second, i.e., 60 megabytes (MB) per second. The actual transfer rate achieved between devices is usually lower, and by a large margin.
| "Storage-class device" means that the camera can be accessed as an external disk drive when connected to a computer, with no need for any proprietary drivers. While most camera manufacturers use this approach, some (Canon!) do not; a real bummer. In a quick speed test, a transfer of 181 image files (total of 1.37 GB) to my Core Duo laptop took 183 seconds; an effective rate of 7.7 MB/s (an 8 GB Extreme IV card was used in camera). A similar test for the E-30 (same card, same computer) resulted in 6.9 MB/s. This may indicate that the E-620 is a bit faster (although the result might have been affected by a slightly newer hard drive model installed in my laptop after the old one died). The advantage of the E-620 over the E-510 seems even a bit larger, if not by a wide margin. | |
ISO Settings:
|
The ISO setting (camera's sensitivity to light, very much like film speed), can be set automatically or manually, in increments of 1 EV or 1/3 EV.
The ISO step value is independent of the step used in exposure adjustment, and I like that. The top value used in this auto-adjustment is one of the preferences in camera customization. It makes sense to set it so that the noise does not becomes excessive (say, ISO 800). You may also set the default ISO, to which the camera will stick if only possible. Interestingly, this cannot be set below ISO 200, which suggests that the actual "native" sensor response may be at that level. Interestingly, auto-ISO is available not just in the Program exposure mode, but also in shutter and exposure priority. Optionally, it can be also activated in the manual exposure mode, which then becomes not-quite-manual. The exact way in which ISO is auto-adjusted remains undocumented in the User Manual. It looks, however, that the camera attempts to stay at the base value whenever possible (at the user-defined shutter or aperture, if applicable), adjusting the sensitivity only if that becomes impossible: up to the pre-defined top value or down (i.e., below the base value chosen). The only exception from this rule is in the Program mode, where the ISO starts being bumped out as soon as the shutter speed nears the slowest handholdable value for a given focal length. This boils down to auto-ISO being just a protection against under- or over-exposure in shutter or aperture priority, and somewhat more than that in the Program mode. Setting ISO to Auto in the manual exposure mode makes it no longer manual: the ISO will be adjusted, if possible, to provide the proper exposure for the selected shutter and aperture. This setting will remain inaccessible unless enabled from the setup. | ||||||||||
Light metering:
|
Full-aperture TTL (through-the-lens) metering has been around since mid-Sixties: the light is measured at full aperture, which provides a brighter viewfinder image, and only then the aperture closes to the selected value. Some cameras perform the last-moment adjustment just after that closing, which is a protection against any mechanical inaccuracies, but I don't know if Olympus uses this solution.
A matrix of 49 (7×7) sensors is used to read the light off the viewing screen, also a common solution. A problem may arise here, as for some lenses the reading may be biased, in need of a correction. Most probably, the camera introduces such a correction, as it knows the exact lens type used — for Four Thirds (FT) lenses at least, which communicate with the camera electronically. For legacy (non-FT) lenses, such a correction has to be determined experimentally by the photographer; this is not unexpected. Because different viewing screens may scatter light differently, a third-party screen replacement mat require yet another correction to be introduced. And, yes, the effect may depend on the lens. This is just an example of issues with which SLR designers have to deal. The metering in E-620 works just fine, which does not mean that you can depend on it without a second thought. The camera will not know if it is photographing a medium-bright subject on a dark background or a white subject on a medium background. The photographer does, and therefore has to decide upon exposure compensation appropriate to a particular scene. | ||||||||||
Metering modes:
|
ESP (Electro-Sensitive Pattern) is a name Olympus uses for matrix metering; it really does not mean anything.
49 metering points is usually enough to detect high contrast or backlighting in the scene, and adjusting the exposure as needed. Still, smaller highlight areas may remain underrepresented; again, you have to learn when and how to use exposure compensation. Most of the time, in a wide-range, sunny scene I apply a compensation of -0.3 EV; if this happens to be too much for a given picture, it can be easily corrected in postprocessing (saving raw image files is not really necessary for that), at the expense of some increase in noise levels. For lower-range or lower-contrast scenes, the default exposure is usually OK without compensation, unless there are large areas of highly-saturated colors. The Olympus matrix metering did not change since the E-410/E-510, so there is no need to change your habits if you have used previous Olympus models. Matrix metering can be performed with or without additional emphasis on the areas close to the AF sensor actually used in focusing. The former option is denoted as ESP+AF, and the choice is not accessible from the basic camera interface; it requires setting another option: what "ESP" really means. Why not a direct setting? Center-weighted metering used to be common in film SLRs and some people prefer it to the matrix mode, considering it more predictable. Usually you decide on one or another once, and keep it there. Spot metering uses one of the 49 sensors to measure the light in the central 2% (as Olympus says) of the frame; that area is approximately shown as a circle in the viewfinder. For an advanced user this may be often the most accurate way to set exposure; it makes most sense when used together with exposure lock (see below). Highlight Spot and Shadow Spot are like Spot, but adding an offset up or down to the measured exposure. While this offset is not documented by Olympus; my measurements indicate that it is close to +2 EV or -3 EV, respectively. This means that with the High Spot the central point should be aimed at an area four timer brighter than medium gray, and with Low Spot — eight times dimmer. Perhaps the offset values should be customizable by the user, who may have some specific working habits here. | ||||||||||
|
Metering range:
EV 1 to 20 (ISO 100, F/2.0) |
This specification, common to all metering modes, is not too informative, as there are few lenses with an aperture of F/2.0. Some simple arithmetics can be used, however, to translate it into a more comprehensive form: with a given lens (of any aperture) the camera can measure exposure at or above two seconds with the lens fully open, ISO 100.
With each doubling of the ISO setting, the longest measurable exposure is halved. For example, at ISO 1600 exposures up to 1/8 s can be reliably measured. Olympus seems to have quite strict metering accuracy requirements for this specification. My experiments show metering to be quite reliable up to 8 seconds or so at ISO 100. In either case, the Olympus metering range seems to be practically the same as for cameras by other manufacturers; no surprises here. | ||||||||||
Exposure control:
|
The exposure control modes are accessed with the dedicated mode dial, like on may cameras, past and present.
Auto is really a general use "panic button" mode, switching to program exposure, and allowing for all settings to be adjusted (except for program shift). The adjustments, however, are lost as soon as you move the dial to another position, therefore moving the dial off and back on to Auto is basically a soft reset to (almost) factory settings. I say "almost", as this resets only the "shooting parameters"; the camera preference settings remain unaffected. | ||||||||||

E-620 exposure program |
The program mode provides the right exposure by adjusting both shutter and aperture. As the graph at the left shows (black line), this is done as follows:
The diagram at left shows two "shifted" versions of the program line in gray, with the shift value of ±1 EV. By default, program shift is accessed directly with the control dial, and one of the first things I do with a new camera (an Olympus SLR, that is) is to disable this access. No, thank you; if I want to exercise more control over exposure parameters, I prefer to switch to the aperture- or shutter-priority mode. Worse, the shift is indicated with just a "Ps" mark in (both) data displays. It is easy to dial by accident and hard to remove, with no indication of its magnitude or direction shown. (In such case, just turn the mode dial back and forth by one notch.)
Aperture and shutter priority: These work as they should. Note that with the Auto ISO option chosen, these modes offer a buffer against running out of the available range of the auto-adjusted parameter. Manual exposure is metered: at a fixed ISO the exposure compensation scale (in the Control Panel or below the finder screen area) shows how does the selected exposure compare to the "right" one. If you want to provide exposure consistency from one frame to another within a sequence, metered manual is the way to go (many prefer this to using the exposure lock button as a toggle). A Shutter and Aperture Priority autoexposure mode (vide, for example. Pentax K-7), while not shown on the mode dial, can be easily enabled by using the Manual mode with the ISO set to Auto. The camera will then adjust, if possible, the ISO value to provide the right exposure at the user-selected combination of shutter speed and aperture. This is less useful than it may seem, as the range of usable ISOs is quite limited. Also, you may end up with pictures from the same session shot at various sensitivity, which brings inconsistency to results (differences in contrast, color, noise, etc.) Still, once one manufacturer has this feature, all others must follow to satisfy box-checking reviewers: "Camera A has nine exposure modes, but camera B only six!". | ||||||||||
|
Dedicated programs (or Easy Shooting Modes) use five positions on the mode dial: Portrait, Landscape, Macro, Sport, and Night+Portrait. They are similar to the Auto mode, allowing for parameter adjustments, but resetting all to defaults upon re-entry.
While a less advanced user may sometimes resort to these programs, a more accomplished one will be probably put off by the fact that the manual does not elaborate how they work. For example, an explanation of the Portrait mode, quoted in extenso is: "Suitable for shooting a portrait-style image of a person". Really? An average user would never figure this out; this is why we have manuals. Still, at least Olympus does not offend our intelligence by calling them Creative Modes like Canon does. They are about as creative as choosing fast food combos by number. Scene and Art Modes are thrown into one bag, as they share a single slot on the mode dial: Art/Scn. They are however quite different:
| |||||||||||
|
Type:
Mechanical, focal-plane, electronic control
|
Most probably, this is the same shutter assembly as the one used in the older E-5x0/E-4x0 cameras, serving its purpose just fine. It runs vertically (along the shorter frame dimension), and its construction details (material, durability rating) remain unpublished.
See my article describing how a focal plane shutter works. |
Speeds:
|
In the automated exposure modes (program, aperture, and shutter priority), and at some ISO, settings some of the slowest speeds may not be available because of the lower limit of exposure measurement. This is to be expected. When set by the user (shutter priority or manual exposure), the shutter speed is adjusted in is 1/3, 1/2, or 1 EV steps (see Exposure Control); in other modes — continuously. The top shutter speed of 1/4000 s is the same as in other cameras in this class (in E-30, E-3: 1/8000 s). In the bulb mode (most of digital camera users may no longer remember the origin of that term), the shutter remains open as long as the release button is held pressed down. It has a limiter, closing it down after a pre-defined time; this can be set between 1 and 30 minutes. |
|
Max. flash synch speed:
1/180 s |
When used with a dedicated TTL flash, the camera will set the shutter speed to 1/180 s or slower.
This value is as per Olympus data; actually, the flash can be synchronized up to 1/320 s or so; see the Flash section. |
|
Release:
Soft-touch, electronic | The release has an accentuated half-press stage; some may like it and some not. It is soft enough not to cause any additional camera shake. |
Modes available:
|
Switching between these modes is done by pressing the There are seven choices in this setting, as both sequential speeds and two different delays of self-timer and IR remote each occupy a separate slot. As an extra complication, this number doubles when the mirror lock option is enabled from the Preferences menu, as each setting gets also a "locked" flavor. Frankly, I do not like this solution, as it requires too much scrolling through options. |
| Self-timer delay: 2 or 10 seconds | Upon the self-timer activation the red lid on the camera grip lights up, to start blinking in the last two seconds. The mirror does not go up at the start of the countdown, but only in the last moment before the exposure. Pressing the drive button again cancels the process. |
Sequential rate:
|
In the sequential shooting mode the camera keeps taking pictures as long as the shutter release is down. Until the memory buffer fills up, this occurs at the nominal rate (high- or low-speed as set); then the rate will be limited to the card writing speed. The shooting can be resumed while the buffer is still being written out.
The "low" frame rate can be preset to 1, 2, or 3 FPS. The "fast" rate is 4 FPS, which is higher than in the E-510 (3 FPS) or E-520 (3.5 FPS) but slower than in the E-3 or E-30 (5 FPS). For a camera in this price range, 4 FPS is quite impressive anyway (at par with the Nikon D90). My experiments have shown that the buffer capacity is close to five frames, which means that the length of a full-speed sequence is limited to five or six pictures. For example, with the SunDisk Extreme IV 8 GB Compact Flash card I've got a six-frame sequence of raw files spaced every 0.26 seconds (with a measurement error of ±0.02 s; very close to the nominal 4 FPS), after which the frame-to-frame interval increased to 0.66 seconds (about 1.5 FPS). For comparison, with a 2 GB xD-Picture "M+" card I've got five frames spaced every 0.25 s, and after that the spacing increased to 3.75 s (0.27 FPS) — quite a glacial pace! For JPEGs the situation is a bit more complicated. On one hand, such files take less space, so that they require less writing time. On the other, the compression process itself consumes CPU resources. The final result depends on an interplay of these two factors and on how the camera multitasking works. At a compression of 1:2.7 (SHQ) I was able to get six frames spaced every 0.28 seconds (a rate of 3.6 FPS, slightly below nominal), and then the spacing would settle at 0.38 s (which is 2.6 FPS). Well, an unlimited-length sequence at 2.6 FPS — not too shabby! For the record: to avoid any other factors getting into the equation, I've been running my tests with manual focus and exposure; shutter speed at 1/125 s. In the sequential mode with single AF, both focus and exposure are set before the first frame, to remain unchanged over the sequence length. In continuous AF, the camera keeps refocusing between frames, which lowers the effective frame rate. |
Remote release:
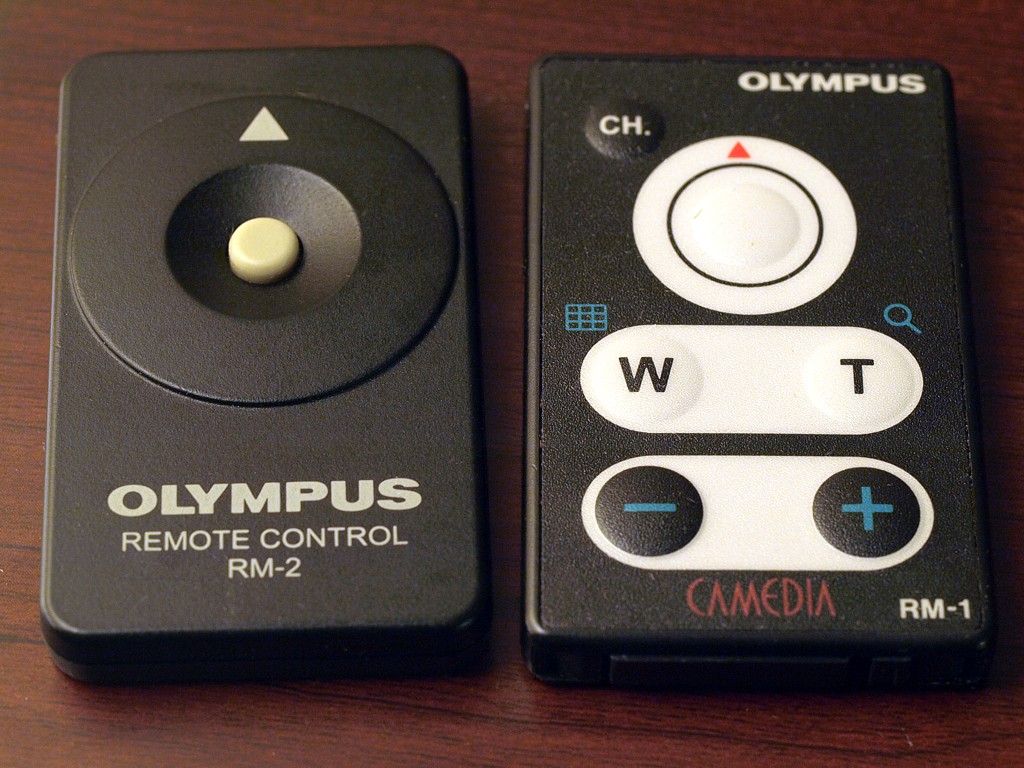
Two Olympus infrared remotes |
The RM-UC1 wired remote plugs into the USB/video socket on the camera's back. It also works with all other Olympus SLRs starting from the E-510/E-410 except for the E-3 (which has a separate, different remote socket). The location of this remote socket (roughly unchanged from the previous models) is not very fortunate: not easy to plug the cord in, and obstructing access to some controls. A socket on the left side of the camera would be more convenient. Olympus sells the RM-1 infrared remote, which has been around for at least ten years. It has six chicklet buttons, of which only three serve a purpose with the E620. The big, white one is used for regular shutter release, while [W] and [T] open or close the shutter in the bulb mode. In Olympus compacts, these two buttons control the zoom — this is not possible in SLRs, where the zoom is controlled mechanically. The RM-1 sells for $30 or so, which is way overpriced (it used to come in the box with most Olympus cameras until a few years ago). Other, similar options include the RM-2 by Olympus (single button, no bulb mode control, no longer in production) or one of the many inexpensive models made in China and sold, among others, by eBay vendors. Those I've tried work just fine, at a much lower cost. You can also remotely control the E-620 using the, the Olympus Studio software ($100). It allows to access to access all camera's settings (except for zoom and focus), release the shutter, and save images to the computer. The camera controller by Pine Tree Computing, does not seem to support the E-620. Earlier this year I discovered another option: a radio remote (HL-HW433 OL80) made by Hähnel of Ireland. At that time it was not sold in the States; since then B&H decided to bring it over (priced at $60, even if at this writing they don't seem to have it in stock). The receiver plugs into the camera's USB port (it can also be attached to the hot shoe), and the transmitter can be operated from up to 30 meters away. In the meantime, I found another version of such device, available on the EBay from a Hong Kong vendor. The thing is named FoToCoLa V2in1 (seriously!) and can be used as both wireless and wired remote. I ordered mine at $30 — it arrived in ten days; it is quite nicely made and finished, includes both batteries, and works as advertised. There are some other similar devices available, which I haven't tried, but I assume they should work just fine. Still, this is the one I've tested from a distance of about 20 meters, with no problems or complaints. |
|
Time-lapse sequences:
No |
The absence of this feature in the E-620 is quite difficult to explain; some simpler cameras include it, and so did the E-10/E-20 years ago.
I've seen a programmable, wired remote with time lapse offered, again, from China on the eBay; this may be a viable option if you need time lapse sequences, but I haven't tried it, so I can't say how well it works. |
|
Mirror lock:
Yes |
In critical applications, the vibrations caused by the mirror slap may affect the picture. This is why most SLRs offer a feature referred to as mirror lock, introducing a few-second delay between the mirror action and opening the shutter. (For some reasons Olympus refers to this as "Anti-shock".)
The mirror lock delay in the E-620 can be adjusted from 1 to 30 seconds, or just disabled. Enabling it will add "locked" versions of all drive modes to the drive mode setting sequence. This is a clumsy solution. What may be the purpose of adding a 10-second mirror shutter delay before every frame of a 4-FPS sequence? The rate becomes 0.1 FPS; one thing just excludes the other! The only effect is that in order to set the drive mode you have to scroll through fourteen options, most of which you will never need. Actually, there should be just one mirror lock option, perhaps as a separate setting, and ignored in sequential modes. Simple solutions work best. |
Dual viewing:
|
The Live View allows you to use the LCD monitor instead of the optical viewfinder, which actually makes your SLR into a non-SLR. For most uses this is inferior to SLR viewing, but in some situations it may come handy; for example, macro and/or low-angle shooting. In this section we will discuss optical viewing only; Live View has its own chapter that follows. |
SLR viewing system:
|
Pentamirror viewing systems are less expensive and less heavy than solid-glass pentaprisms, and that's why they are used in all compact digital SLRs. This is at the expense of some loss of brightness in the viewed image.
The 95% coverage is the same as in the E-5x0/E-4x0 models, lower than 98% for the E-30 or 100% for the E-3, and the same as of any competing models from other manufacturers.
The finder magnification of 0.96× is slightly more than 0.92 on the E-5x0/E-4x0, but still below 1.02× on the E-30. Handling the E-620 and E-510 side-by-side, I can easily see the difference; using just one camera at a time — not really. To compare finder sizes across various DSLR lines, refer to a separate article on that subject. The comparison includes also the E-620. According to Olympus, the viewing screen is not interchangeable. |
Information shown:
(From the Olympus E-620 manual) |
The information is laid out below the finder screen, which is better than in the E-510/E-520. It can be quite easily seen together with the screen image — unless you are wearing glasses, in which case you have to move your eye quite a bit; tough luck. (The E-30 is significantly better in this respect.) Anyway; next to the E-510 this is some improvement.
The data shown is identical to that in the E-30 and E-3 (except that the exposure compensation scale does not double as a level indicator, as it does it the former case).
(Picture from the E-620 manual.) The items marked with (*) asterisks in the list denote those shown just a on/off flags (as opposed to value indicators), usually showing that a setting is off the default value, or that a feature is activated. The illustration at left, depicting the finder layout, is only approximate: in reality, the AF sensors cover less of the width of the frame than shown here. |
|
Diopter adjustment:
From -3 to +1 diopters |
A typical range; should be OK for most users. The adjustment knob is to the right of the eyepiece, and feels exactly like that in the E-510: adequate, but that's it.
Two optional eyecups with additional correction may help those who need it. |
Other features:
|
All Olympus DSLRs except for the E-1 use the same slide-on mount for eyepiece accessories. Actually, such accessories from some other systems can also be used: for example, those fitting Pentax models.
The eyecup supplied with the E-620 is EP-5, the same as in the E-510/E-520. While with a larger camera I would prefer the EP-6 or EP-7 (included with the E-3), for this one the EP-5 seems just right. There is also a magnifying (1.2×) ME-1; eyecup available. It fits the E-620, offers less protection from stray light, and makes viewing the full screen at once somewhat difficult. Mine gathers dust in a drawer. Olympus also lists two corrective eyecups (+2 and -3 diopters), which I haven't tried. The E-620 does not have an eyepiece shutter, like the one in the E-3, offering a plastic slide-on eyepiece cover (EPC-1) instead. At least it can be attached to the camera strap, which will protect it from being lost at the first opportunity. The camera is missing a dedicated depth-of-field preview button (in the E-3 and E-30 it was located near the lens mount, like on most film SLRs). Instead, such preview has to be assigned to the [Fn] button, perhaps at the expense on some other function you may need more. I do not consider this a major flaw, as DoF preview is not so useful at these finder sizes anyway. Actually, I used it only in medium-format cameras in the past. |
|
Type:
Mirror-up, main imager used
|
Live View allows you to use the LCD monitor for previewing the scene, instead of the optical viewfinder. In the E-620, the preview image is created my the same sensor which is used to capture the picture. (Some recent Sony SLRs have an additional imager, dedicated solely to the preview, like the Olympus E-330 of a few years ago; this solution has both good and bad sides.)
When originally introduced in the E-330, Live View was shunned by other camera manufacturers as nonessential; now it is included in all digital SLRs. While I still consider Live View nonessential for most purposes, there are a few applications where it can be very useful. For example, I use this mode for practically all my tabletop shooting, and also for infrared. If you really need Live View, then you will really appreciate the tilt-and-swivel monitor on the E-620. True, this was already present on the E-3 and E-30 — but, until very recently, not on any compact SLR. (Just some very recent models: Nikon D5000 and Sony A330/A380 sport this feature.) I do quite a lot of tabletop photography, and having an adjustable monitor angle is a feature I couldn't live without. Only now I can retire my C-5060. The opinions are split about which solution is better: adjustable monitors with just one degree of freedom (up or down, often limited angle) or two degrees (tilt and swivel, virtually unlimited). The latter offers more flexibility, but some may dislike the monitor sticking out to the left side; the former solution is more compact in use. Olympus tried both approaches in the past, before settling down on two-axis rotation. Nikon and Sony so far stick to the up/down only solution. Frankly speaking, I have no preference here. And one more thing many people may not be aware of: using the Live View raises the temperature of the imager; this cannot be avoided. A warmer imager generates more noise. While we do not know how the increase in temperature depends on the usage time, I would expect the effect to be not negligible. | |
Live View data display and options:
| What part of this information is being shown depends on the particular display configuration enabled at the moment. Switching between these (eight of them!) is done by repeatedly pressing the [INFO] button. If you find this too tedious, some configurations can be disabled and therefore excluded from the sequence, making the process faster. | |
|
Switching to the Magnifier viewing mode shows a green box, outlining a fragment of the preview. Pressing [OK] will toggle that view with the fragment shown full-screen. The magnification can be adjusted to 5×, 7×, or 10× (control dial), and the fragment can be moved around the frame (cursor keys). The quality of the magnified view is quite high; good enough for focus evaluation (certainly better for this purpose than the optical finder).
At normal and moderate light levels (down to your living-room illumination) the preview looks good: clear and noise-free. Below that (say, EV 0, i.e., 16 s at F/2, ISO 100) it becomes noisy and less readable, but this is to be expected. Normally, Live View attempts to show the scene the way it will look in the captured image (correcting for exposure, white balance, etc.) This is not always possible: you cannot refresh the preview 30 times per second if the right exposure is 2 seconds. (Besides, even without going into long exposures, Live View will not show how the picture will look when the flash fires.) This is why under some circumstances you may want to enable the Live View Boost option, adjusting the preview brightness for convenience. Unfortunately, you have to do that from the menu system. With the boost on, the luminance histogram shown is wrong: it seems to reflect the "boosted" scene brightness, not that of the (expected) capture. There are a number of reasons why this may be difficult (if at all possible) to fix, but at least the histogram should be disabled when the boos is on. I keep complaining about this since the E-510. The multi-view (Perfect Shot, as per Olympus terminology) display is not really useful. You can see the effect of adjusting the exposure compensation or white balance, shown as four tiny image thumbnails on the monitor. To see more of these thumbnails, or to change the parameter adjusted, cursor keys are used. The small thumbnail size, especially if combined with outdoor viewing conditions, makes any decisions based on this display of a questionable value. And then we have another feature "trickled up" to the E-620 from point-and-shoot cameras: Face Detection, activated from a separate setting. The sensor-based preview image is analyzed to determine if there are any faces there; then the AF point and exposure are adjuster to render these areas best. For obvious reasons this works only in the Live View mode; no complaints about that. (Getting rid of this limitation would require introducing a separate image sensor just for the live preview, see my remarks above.) This is a feature which, if and when it works, may benefit only those who do not use AE/AF lock and/or exposure compensation; these users will be better off getting a non-SLR camera anyway. | ||
|
Imager-based AF and AE:
Yes |
The E-620 can use the imager itself for both autofocus and autoexposure in Live View mode (in the SLR mode dedicated sensors are used for both these purposes). This means that focusing the preview image no longer requires the mirror to go up and back down like in the E-510/E-410 or E-3 (as long as a compatible lens is used; more about it later). This change was introduced originally in the E-520/E-420, and can be also found in the E-30. It actually converts your SLR into a non-SLR, with all pros and cons attached to that camera type. While in Live View, autofocusing and autoexposure metering can be performed in three different ways:
The progress in sensor development over the last year or two brought us to the point where contrast-detection AF by the imager is good enough for many purposes, even if not as fast and accurate as phase-detection AF using dedicated sensors. Still, changing your SLR camera into a non-SLR (functionally, at least) complicates a bit the sequence of events during a picture-taking cycle. Here is how things work (in default settings) in the E-620:
While this is some improvement from the E-510, E-410 and E-3 (see [2]), the mirror activity (point [3]) could (and should) be totally eliminated while in the Live View mode with imager AF. (It cannot be avoided in Hybrid and Sensor AF modes, however, see below.) The imager-based AF is available only with some recent lenses: 14-42 mm and 40-150 mm sold with E-5x0/E-4x0 (and now, the E-620), the updated 14-54 mm ZD II, and the 25 mm pancake; also the 70-300 mm ZD (with the latest firmware). See my Four Thirds lens list for (hopefully) updated details. Even with these lenses you may prefer the accuracy of the dedicated AF circuitry; for that, switch to the Hybrid AF, where CD AF is used just for the preview, not for picture-taking. Users who prefer to resort to manual focusing under certain circumstances may find the Live View quite useful here: the magnified view makes the process more accurate than using the optical display. | |
|
Autofocus:
Passive TTL
|
The AF system in the E-620 is new: no longer the three point approach used in the previous E-5x0/E-4x0 cameras, but short of their premium solution in the E-3/E-30.
Obviously, this section covers only the SLR-type (phase-detection) AF, as opposed to the contrast-detection AF used in the Live View mode and described there. |
|
Number and type of sensors:
Seven, twin cross
|
The mass-market understanding of autofocus is that more AF points must be better than less. This is not necessarily the truth, but no manufacturer would dare to oppose the market. This is why Olympus switched from the three-point system used in their SLRs up to the E-520 to a new one, sporting seven points.
Five of these constitute a wide row in the middle of the frame; two more are added below and above the center, see the illustration in the Viewing System section. While AF point autoselection from a wide pattern (a default) can be useful in point-and-shoot applications, more advanced users will want to have a degree of control over where exactly in the image the focus is set. This can be done either by switching to a single (central) AF point mode and locking the focus position, or by specifying which of the AF points will be used. The latter approach is most useful in tripod shooting; both should deliver basically equivalent results (except for wide image angles, where re-pointing the camera introduces some meaningful inaccuracy, but this is largely masked by depth of field). Five of these sensor points are cross-type (sensitive to both horizontal and vertical detail). All of them are of "twin" kind, each with a double sensing array; this should increase focusing accuracy. Unfortunately, Olympus does not consider camera users to be worthy of information which of the AF points are cross-type; this is not clarified in the manual or in any promotional materials. |
|
Autofocus EV range:
From EV -1 to 19 (F/2 lens, ISO 100) |
This is half-way between the E-3/E-30 (-2 EV) and the E-5x0/E-4x0 (0 EV).
In more transparent terms, the low end of -1 EV means that the AF system should work at exposures up to 8 seconds at ISO 100 (regardless of lens aperture). I haven't tested this, but for the previous Olympus SLRs I found the manufacturer's claims to be on the conservative side; i.e., the actual performance was somewhat better. Similarly, I was not in a position to test the AF speed on the E-620. My impression is that it has not improved compared to the E-510; certainly less responsive and often more hesitant than in the E-30 (compared side-by-side). In particular, I'm not really happy with how the camera's AF works with the 70-300 mm ZD lens. Sometimes it would just refuse to work under daylight, open-shade conditions. With the "kit" 14-42 mm and 40-150 mm ZD lenses) or with the 12-60 mm ZD) I did not have such complaints. |
Focusing modes:
|
The single AF mode activates the focusing circuitry when the shutter release is half-pressed; as soon as the focus is set, it is locked in position. (The button assignments can be changed, see further down).
In the continuous AF mode the camera will keep adjusting the focus while the button is held down, until the mirror goes up just before exposure. The focusing is predictive, i.e., it follows the subject and tries to extrapolate its position to the moment the picture is taken. Actually, I was never happy with continuous AF on any camera I tried, and the E-620 is no exception here. Just do not expect a significant percentage of keepers from a C-AF point-and-shoot session; shoot ten times more frames than you think you need. The mixed modes (last in the list) allow for manual focus adjustment after the AF system locked it. Some ZD lenses (certainly 12-60 mm ZD; I'm not sure of any others) allow to do that regardless of the focus mode set. In the MF mode, the AF system provides focus confirmation in the finder (green Focus OK light), as long as a Four Thirds lens is being used. (This limitation can be removed by using a lens adapter with a Russian Dandelion chip installed.) As I'm resorting to manual focus very rarely, I don't think this is really important, but some people may. In that mode you may also have the camera autofocus every time you press the Lock button. I found that quite practical (autofocus, but only I decide when); the approach requires a preference setting before it can be used. I was hoping the E-620 (as loaded with features as it is) will resurrect focus bracketing (included only on the E-500). Nope. Also, an option to set the lens instantly to the hyperfocal distance (possibly with user-defined tolerance) could be nice. |
|
Autofocus lock:
Yes |
By default, the focus is locked (as is exposure) when the shutter release button is half-pressed. This can be customized in a very flexible way — the AF and/or AE lock functions can be assigned in a number of ways to the Lock and release buttons, independently for each focusing mode.
This customization did not change since the E-510 (why should it?), and the process is described in a number of my articles; see, for example, E-30 customization. |
AF release lock:
|
Focus priority means that the camera will not trip the shutter until the focus was not achieved in one of the AF modes; release priority means it will regardless. The default settings, as shown here, can be customized to your liking.
Interestingly, focus priority will also prevent the shutter release if the (dedicated or internal) flash is not recharged. |
|
AF assist beam:
No; internal flash used | The stroboscopic AF-assist flash burst is obtrusive and I find it annoying; a dedicated light would be better (you can find such light on Olympus FL-36/36R or FL-50/50R flash units). |
|
AF calibration:
Yes, manual |
This is an interesting, and potentially useful, feature; it was introduced only in the E-30. The subject may deserve some explanation, so here it is.
As fast and accurate the dedicated-sensor (phase detection) AF may be, it is not without caveats. Most importantly, the sensor has to be at exactly the same effective optical distance from the lens as the imager is; otherwise it will set the focus behind or in front of the actual image plane. This is the main (if not only) reason why we may experience front- or back-focus; other possible factors may introduce an error depending on the lens, or even the focusing distance (I would expect those to be of lesser magnitude, though). Well, even changes in temperature may de-calibrate autofocus to some (if minor) extent: the distance from the lens to the imager may change differently than the one to the AF sensor. And, to do some nitpicking, each wavelength focuses at a different distance, so the AF sensor should have a response similar to that of the human eye. AF calibration is supposed to address this potential problem. It is activated from the menu system, and performed manually. First, you can introduce a global correction, common to all lenses used. (This should address, I believe, the most significant part of the problem: optical path length difference.) This is done on a scale ranging from -20 to +20 steps (of some undocumented character and magnitude). Then, you can override that for a given lens (identified by type and serial number). You may have multiple corrections for the same lens: for example, for different zoom focal lengths; up to twenty lens setups can be registered. Finally, for a given lens setup you can override corrections at individual AF points (seven in this case). The camera will not tell you how the correction you've entered works, therefore the process has to be done by trial and error. Olympus recommends doing this with a high-contrast target at the distance of about three meters, and at the ambient temperature close to your most common shooting conditions (yes, I was right above!). The process may sound intimidating, but it really isn't (well, I have yet to try it, so I may change my mind). Let us assume we want to calibrate a given lens without adjusting individual AF points. What I would do is to capture a series of test images, autofocusing with the center point only, with corrections ranging from -10 to +10, analyze the results off-camera, and choose the best, assigning it to the given lens. (If the best results are at one of the extreme values, you will have to shoot another sequence, from that value outwards; tough luck.) Doing the same for individual AF points is, I would think, an overkill. Now, while I would expect the factory AF calibration to be accurate enough, it feels reassuring to have such an option. I am, however, a bit disappointed that Olympus stopped half-way here, requiring the process to be done manually. A sequence as described above could be automated, with the camera shooting a test picture for each correction value, analyzing the results, and choosing the best setting from a series. After all, the firmware already includes the code to evaluate local detail at a given point: it is used in contrast-detection AF in the Live View mode, and based on the same information as that stored in raw image files. I am sure some people are already working on this in Tokyo or Yokohama; the question is who will implement it first. |
|
Operating principle:
Body-based, moving sensor |
Olympus SLRs use in-body image stabilization (Canon and Nikon stick to lens-based solutions, most probably for compatibility; so does Panasonic for reasons unknown; Sony and Pentax went the other way). In such IS systems, the camera/lens shake is detected by a dedicated gyroscopic device, and a coupled micromotor moves the sensor to compensate for it.
In lens-based IS, a micromotor drives a corrective lens element (or group). This means that a given lens design cannot be just retrofitted to accommodate this function; IS has to be taken into account when the optics is being designed. While this may allow for tweaking the process to a given lens, it also opens a Pandora's box of design problems and compromises. I suspect it is just a matter of time until Canon and Nikon switch sides in this controversy. There is certainly an advantage in being able to use image stabilization with any lens, not just with those which have it built-in. Panasonic's decision to employ lens-based IS in their Four Thirds (and Micro Four Thirds) cameras is hard to understand. Still, their IS lenses can be used on Olympus bodies, with either the in-lens or in-body stabilization enabled (but not both simultaneously). In the E-620, image stabilization also works with legacy (non-Four-Thirds) lenses. You have to enter the lens focal length by hand, though, to achieve best results, as the lens does not "introduce itself" to the camera. |
Operating modes:
|
You may want to switch into a one-dimensional IS mode if you are planning to pan the camera following a moving subject. For other applications, the two-dimensional mode is recommended.
It is recommended to turn IS off when shooting from a tripod. I am not quite sure why; it would be nice to know. |
|
Stabilization effectiveness:
Up to 4 EV (as claimed by Olympus)
|
This value is supposed to describe the average difference between longest handholdable shutter speeds with and without IS enabled. 4 EV means exposures 16 times longer (for comparison: the E-5x0, E-3, and E-30 claimed "2 to 5 EV", i.e., a factor of up to 32×).
Without, however, any indication about under what conditions a gain of 4 EV may be realistic, the only way I can translate "up to" is "not higher than", which does not mean much. In the past I have developed a statistically sound procedure to measure this gain for a given camera and particular focal length (and, to some extent, other shooting conditions; this is hard to avoid). I have used this procedure to evaluate IS efficiency in the E-510 and E-3. The results for both cameras were quite similar: about 1 EV (2 ×) improvement at the focal length of 12 or 14 mm, about 1.5 EV (3×) at 42 or 60 mm, and a bit more than 2 EV (close to 5×) at 150 mm. The general trend seems to be clear: the slower is the minimum handholdable speed (within some limits, that is), the greater is the effect of image stabilization. While I haven't checked the IS performance at 300 mm, I would expect it to be even higher, but not probably at 4 (or 5) EV. The IS system in the E-620 has been changed, compared to the previous models. According to Olympus, the new version weighs about 20% less. This also means that its performance might also have changed (the manufacturer's claims about it certainly did). Still, I do not expect the change to be drastic, and I'm too lazy to re-run my tests for the '620. |
|
Internal:
GN 12 m at ISO 100 |
The internal flash has the same light output as that in the E-5x0 cameras; typical from small SLRs. The Guide Number (GN) defines the maximum distance (DMX) for flash pictures at a given aperture (F-number, or FN): DMX = GN/FN. The output (energy) of light is proportional to GN squared: doubling the guide number means a flash four times as powerful. By default the built-in flash pops out automatically as needed. Here the camera decides what "as needed" means, so most of us will want to disable this feature. The recharge time is usually below three seconds, depending how close to the full power the previous burst was. As with any other camera I know, the internal flash is barely usable for any picture taking. It can be used in emergencies, and also as a fill-in outdoors. (Another possible use is that of communication with other units in remote flash mode, see below). |
|
External:
Olympus flash system
FL-36R |
The Olympus flash system includes three hot-shoe models: FL-50R, FL-36R, and FL-20, plus a ring flash and a dual on-lens flash.
The older FL-36 and FL-50 are cannot remotely controlled from the built-in unit, but this seems to be the only difference. See my Olympus flash article (as outdated as it may be), or one on the FL-36. The FL-20 as feeble as it may be at GN 20 m (ISO 100), provides almost three times more light than the internal unit and fits in a small pocket; it also moves the burner away from the lens, which is a good thing. It is overpriced for its specs, but it may be handy as a last-resort option in a pocket of your camera bag. The FL-36 ("R" or not) is a more powerful option, OK for direct use, but not really for bounced light. For the latter, use either the FL-50R or the Mecablitz 58 AF-1 by Metz. The Metz unit provides full Olympus integration (including remote control and fast shutter synchronization), and additionally — a second burner to soften the shadows; a feature I've been missing on FL-50R. |
|
Remotely controlled flash:
Yes, up to 12 units in 3 groups
The RC Flash Control Panel |
The camera talks to remote units via a burst of light from the built-in flash. The output of external flashes can be adjusted in three ways:
Interestingly, each of the three remote flash groups may be set to use a different mode out of these three; each also may have its own exposure correction (or fractional setting). As I haven't used the remote flash yet, I cannot say how well it really works. Enabling the RC flash from the Settings adds a separate page to the Control Panel, dedicated to this purpose. |
|
Slave flash option:
Yes. |
A slave unit (or units) can be triggered by the built-in flash. As neither knows of the other, this makes sense only if the internal unit is set to manual. The intensity of the latter can be adjusted as needed. |
|
External connection:
Dedicated hot shoe | The camera is missing a flash socket. Instead, there are a number of cable adapters offered by Olympus, plugging into the hot shoe and providing the proper contact on the other end (dedicated or not), so that a flash bracket can be used. I haven't used any of these. |
|
Non-dedicated flash units:
Yes |
The hot shoe will also accept any generic flash with a single contact pin
Last time I checked, Olympus units used just below 5 V on their flashes. It is unclear what is the highest safe voltage on the E-3's hot shoe, 12 V or so is certainly safe enough. You may be fine with more (at your own risk!). Some of the older flashes may have up to 300 V on the contact pin, and your camera may not survive that. Providing a proper exposure with non-dedicated flashes is very simple — as long as the flash provides most of the illumination of the scene, and as long as it has its own light sensor (most do). For that, you set the camera to manual exposure mode, ISO of your choice, aperture required by the flash for that ISO (some flashes offer a choice of two or more apertures here), and set the shutter speed — to 1/180 s (or longer, but here we want to limit the uncontrolled input of ambient light). There is no communication at all between the camera and flash; still, the latter measures the light scattered off the subject and throttles the output when it has enough. As long as you stay within the maximum flash range, the pictures will be properly exposed (with the usual caveats, that is). It is amazing how many camera users are not aware of such option, thinking they must use a dedicated flash for worry-free shooting — at a considerable extra expense. Actually in many situations a flash-based exposure automation may provide more predictable and consistent results. |
Flash modes:
|
This is applicable only to Olympus dedicated units (including the built-in flash).
Some of the modes listed here make sense (and therefore are available) only in certain exposure modes (PASM), as shown in brackets. (There are also some limitations in full Auto and in dedicated programs; let me skip the details.) Switching between flash modes is done with use of the flash button and the control dial. Here are some details:
|
|
Flash compensation:
From -3 to +3 EV. |
Like in previous Olympus cameras (even before the Four Thirds), flash compensation can be applied on top of or instead of the regular exposure compensation (a preference setting). It is dialed in with use of the flash button and the front control wheel.
Olympus dedicated flashes (FL-36, FL-50, 'R' or not) allow for setting of an extra amount of compensation on the flash itself; in addition to any set from the camera's interface. |
|
Flash metering:
Through-the-lens |
A trial, low-intensity flash burst just before the actual exposure is used by the camera's light metering system (after being reflected off the scene, that is) for exposure automation.
This may be the actual reason why the mirror goes down in the imager-AF Live View mode immediately before the exposure. |
|
Max. flash synch speed:
1/180 s |
This is as per Olympus specifications; the same as for the E-5x0/E-4x0 cameras, and a bit (0.5 EV) slower than for the E-3 or E-30.
The actual full-synch speed seems to be 1/320 s, 0.8 EV better than specified. You will be able to use it, however, only with non-dedicated, third-party units. With a dedicated flash the camera will override any shutter speed setting shorter than 1/180 s — except when the multi-burst ("Super FP") flash mode is used. The Super FP mode (available with the FL-36R and FL-50R) allows for flash synchronization at any shutter speed: for those above 1/180 s the flash is emitting a series of lower-powered bursts (your eye sees them as one), so that the full frame is exposed even if the shutter is never fully open (except that various stripes across the frame are exposed at slightly different times). This is at the expense of higher power usage and smaller range; it may be useful when the flash is used as a fill with the ambient light calling for exposures shorter than 1/180 s. |
White Balance:
|
As the WB correction is actually applied only during the raw-to-RGB conversion, if does not affect raw image files (except that they contain this information, so that you may use WB "as shot" in postprocessing).
Some WB correction can be also applied to saved JPEG images; this is usually more than enough to fix small deviations. Most users resort to Auto WB in their shooting. This is not really what provides best results, for reasons beyond any camera's capabilities: the WB systems are often incapable to distinguish between the color of scene elements and the coloration of the light. (Significant white areas in the subject may help here, but this has caveats, too.) Using one of the predefined, fixed settings gives usually better results (you just have to remember to do it). Here are the options:
The Custom WB can be used to set the color temperature directly: higher to get warmer (more reddish) images, lower to get them colder (more bluish). The range goes down all the way to 2000K; useful for low-wattage bulbs. The Kelvin value can be adjusted directly from the Control Panel: set WB to Custom, press the [+/-] button and turning the dial. One of my favorite features in Olympus cameras is setting the WB by reference, or One-Touch WB: reading the light of a white (or gray) surface. In most situations this is the most reliable way of WB setting. This has to be pre-assigned to the [Fn] (user-defined) button to become accessible at all (too bad!). When that button is pressed, and the shutter released, a test frame will be taken and analyzed, and the setting stored for a later recall. Sometimes the camera may signal a failure (non-uniform reference surface, or mixed light sources), but most of the time it delivers very accurate results. All WB settings can have an additional correction applied, globally or individually for each; in two color planes (amber-blue and green-magenta). |
WB Sensors:
| The E-620 (like E-3 or E-30) has an external WB sensor; this makes the Auto white balance setting somewhat more reliable: it works somewhat similar to an incident light meter. The E-5x0/E-4x0 cameras did not have this feature; it may be of help — if you still insist on using Auto WB. The sensor can be disabled in camera setup. |
|
WB bracketing:
Three steps each in one or two color planes; three or nine frames total. | I consider this feature rather useless. The camera does not actually shoot three (or nine) pictures; it only saves that number of image files based on one raw image, each with a different WB compensation applied. (In case of raw files, all will be identical except for the "WB as shot" information, which really does not make sense.) If you are not sure, save an ORF file and apply correction in postprocessing. |
|
Noise suppression:
Static and random |
The two components of noise, static (fixed) and random, are caused by different reasons; of these static will be dominant at longest exposures (above two seconds or so, depending on the ISO setting). They are both handled differently in the E-620 (no change from previous models), and I can see that some users are still confused which is which.
1. Noise Reduction (NR) Noise Reduction is used to remove the static noise, which, at given ISO and shutter speed, has the same pattern from one frame to another. To do this, the camera takes a separate, "dark" frame — not opening the shutter at all, but activating the imager for the same time as the original frame shutter speed, just after the actual picture; this information is then subtracted from the original image. This works quite well, especially (if not only) in removing the "hot pixels" showing at long exposures and high ISOs. On the other hand, any random noise present in the picture will be increased (I would expect a 41% increase here; those who took some statistics class will know why), so the technique should be applied only when the static component is more of a problem, i.e., at long exposures. The dark frame exposure also adds an extra delay before the image is saved; this is why NR. regardless of its setting, is disabled in the sequential drive mode. Makes sense. Noise Reduction can be set or Off, On, or Auto. According to the manual, in the On setting it will be applied always (regardless of the ISO or shutter speed), in Auto — only "when the shutter speed is slow", whatever that means. (Another example of how the Olympus documentation excels in depth.) 2. Noise Filtering (NF) Noise Filtering reduces the random noise, where the response of a given pixel to light varies from one frame to another. While the filtering algorithms get smarter (and more CPU-intensive) every year, this may often lead to undesirable artifacts (not limited just to detail loss), which may depend on the contents of the image. Noise filtering may be applied before, during, and/or after the raw-to-RGB conversion; in the first case even raw image files may be (partially, at least) denoised. The filters may be tweaked to provide results pleasing to the eye and/or working well with common resolution test patterns (after all, how many people base their buying decisions on camera reviews and "reviews"?). My comparison of in- and off-camera raw processing leads me to believe that raw Olympus files are really raw; i.e., noise filtering is applied during and after the conversion. This is good news: the rawer the better (assuming you want to use the raw format, which I don't). Additionally, recent Olympus SLRs (the '620 in that number) allow you to set the NF strength to Off, Low, Standard, and High. While generally the Olympus approach to filtering is quite conservative (less is better!), in the E-510 I settled down on Off, while in the E-30 — on Low. In the E-620 so far I'm leaning towards the latter. This may, of course, depend on the ISO setting; one size may not fit all. Remember that even in the Off setting some noise filtering is applied: the part being a common component of the demosaicing of the Bayer pattern. |
|
Color space:
sRGB or Adobe RGB | I've met people who believe that switching to Adobe RGB will automatically provide them with better results. Quite the opposite, at least usually. Leave this at the (default) sRGB, unless you are an expert in the area of color profiles, color spaces, device calibrarion, and related issues, and unless your pictures will be viewed and printed only on devices set up for Adobe RGB and calibrated properly. |
Picture Modes:
|
These presets are (putting the film speed aside) a digital equivalent of various film types, exactly like in the other recent Olympus models. Each offers different color, contrast, and sharpening options (applied in raw-to-RGB conversion); these can be additionally adjusted within each preset (with the changes being persistent, i.e., permanently assigned to it).
Other manufacturers provide what basically is the same feature: Picture Control (Nikon), Picture Style (Canon), Custom Image Settings (Pentax) or Color Modes (Sony). It would be darned nice if everybody agreed to the same terminology here; after all, this is what language is about. While not unique, the Olympus implementation has one advantage over the competition: the adjustments to Picture Models are seen at a glance in (and can be easily changed from) the Control Panel, without using the menu system. There are also Portrait and Custom Picture Modes (but no Landscape one). The Portrait mode is supposed provide better rendition of skin tones, and Custom is a slot for user-defined preferences. The latter is set up starting from one of the other modes used as a template; it also is the only one memorizing the Gradation setting (see below). Because Picture Modes are applied only in the raw-to-RGB conversion process, they do not affect raw image files. The settings are, however, stored inside those files, so that they can be used (or not) when such conversion is done in off-camera development, using the "as shot" selection. Obviously, this note also applies to the Image Adjustment section below. |
Image adjustment:
|
Sharpness, contrast, and saturation settings are persistent for each Picture Mode and can be adjusted directly from the Control Panel for the currently used mode. The adjustments are set from -2 to +2 arbitrary units, and are applied on top of the default presets for each Picture Mode. In other words, the Vivid and Muted modes with contrast at zero will be different, as they differ in the (hidden) base value.
With a good EXIF reader (like ExifTool) you can see the absolute settings of these parameters; the base values are listed in my E-30 settings article.
It is hard to understand why Gradation is not a part of Picture Modes (except for Custom), when Contrast is. After all, both modify the tonal transition curve, if in different ways. Inconsistent. The Monotone [sic!] Picture Mode converts the image to monochrome, allowing you to apply a color "filter" to the conversion (e.g., red to deepen the sky dramatically). The resulting image can be also tinted (like, or example, the sepia effect). Language, again. Here is what monotone really means. One day I'll write an Olympus-to-English dictionary. |
Lens correction:
|
Thanks to the digital interface, the camera is aware of the exact model of the Four Thirds lens mounted on it. This either contains the data on the lens geometric distortion and off-axis light fall-off (vignetting) or points to such information in a look-up table used by the firmware and/or Olympus postprocessing software.
It is not quite clear which of these two solutions is used, but there are indications to the former. Some aspects of this, obviously, may depend on the focusing distance, aperture, and zoom focal length. Light fall-off correction, when enabled in-camera, seems to be applied during analog-to-digital conversion, so that the raw files are affected. This is similar to the E-30. If not enabled in-camera, Olympus Studio or Olympus Master will allow you to do it in postprocessing (JPEG or ORF); otherwise you can only apply a manual correction, as opposed to one depending on recorded lens information. This clearly indicates that in- and off-camera corrections are quite different, even if serving the same purpose. I've checked how this works with the 14-42 mm ZD kit lens; it seems to remove most of the vignetting just fine. Obviously, this is done by stretching the histogram towards the corners, so it will be accompanied with some noise increase in affected regions. Geometric distortion can be automatically corrected only in postprocessing (from a saved JPEG or ORF file, using the Olympus software); all the camera does is embedding the lens information in saved files. For simple (most common) distortion this works just fine; for higher-order patterns (like in the 12-60 mm ZD lens), the correction is not as effective. Those who choose not to use Olympus Master or Studio will resort to similar functionality available in other postprocessing applications, even if the correction has to be tweaked manually. No big deal. |
In-camera image editing
|
The raw-to-JPEG conversion is the same as the conversion automatically applied when a picture is taken to be saved as a JPEG. The image adjustment parameters used are as set when the conversion is done, not when the picture was taken. This means, for example, that even if you do not do any off-camera postprocessing, you can shoot a risky picture in the raw mode, to try various adjustments later (white balance, sharpening, noise filter). This of course does not include exposure compensation or any other parameters which affect the raw data. There is also a separate function, Image Overlay, allows you to select two or three raw images to be superimposed (each with an individual brightness correction) into one final JPEG — a postmortem double exposure of sorts. While this may be moderately entertaining, it is not too easy to judge the effects on the camera's monitor; if I need a double exposure, I can do it better when postprocessing my images. Image rotation is just that. The in-camera orientation sensor does a job, and the information is saved as a flag in image files, some graphics applications ignore that flag, so you may want to apply a manual override. Of course, you can do it on a computer, too. The remaining editing functions are applied only to RGB (JPEG) images: shadow adjustment (similar to the Auto gradation), red eye fix (quite effective), crop (with a separate option limited to predefined aspect ratios), B&W or sepia conversion, image downsizing (resampling to lower resolution). None of them is really useful; all can be better applied in off-camera postprocessing. Luckily, they are all hidden deep in the Play menu, so they do not clutter the user interface (the only downside is a waste of developers' effort). |
Art Modes:
|
These are special effects applied only when the image is converted to RGB. All are basically take-it-or-leave-it options, leaving no room for user's adjustments of the effects.
Selecting an Art Mode switches the camera into the program exposure mode, with most of the picture-taking parameters still accessible (if not through the Control Panel, due to conflicting claims to that real estate). This is the most useless feature I've ever seen on an Olympus camera. The effects are non-adjustable and quite crude, and advertising them as a feature differentiating the E-620 (plus some other Olympus models) from the competition just offends my intelligence. Adding five call-by-number, non-adjustable effects does not make a camera "creative"; not in my book. People, you came up with a well-designed, well-built, and well-performing camera; you do not have to add a spoonful of manure to a barrel of honey! A portrait filter effect applied to an image is an example of a feature I would accept in a (supposedly) entry-level SLR — something like the outstanding Glamour effect you can use in Paint Shop Pro. Such effects are, however, hard to implement and CPU-hungry; this is we do not see them implemented (or, at least, well-implemented) in the current generation of cameras. |
Scene modes:
|
These share the mode dial position with the infamous Art Modes; toggling between both groups is done with the [OK] button.
The names are self-explanatory, except for DIS: Digital Image Stabilization, which is a fancy name for increasing the ISO and shutter speed to capture a moving subject. This has nothing to do with image stabilization (if we modify the semantics agreeing that it does, we will admit that image stabilization has been included in almost every camera of the last 100 years). Selecting the DIS mode can be used to say: "I'm a moron: I don't know that to avoid motion blur I need higher shutter speeds, hence higher ISO. Well, I don't know what shutter speeds are; I bought this camera by mistake; I have no clue how to use it, please help!" Ironically those who may be inclined to use this feature are least likely to read the manual deep enough to know what DIS stands for and when to use it, not to mention what disadvantages it may bring. Almost all camera's parameter adjustments (including exposure compensation) are disabled in these modes; the one exception I could find was AF point selection (maybe there are some others, not that we should care). I'm leaving aside the underwater modes, as this is not my area of expertise. Let me just mention that they will appear in the scene mode selection list only if previously enabled from the settings. The panorama mode provides a display aid (in Live View only) to help in overlaying the frames in sequence as needed. This could be useful, except that the feature is accessible only when an Olympus-branded xD-Picture card is used, which I find obscene (there are no technical reasons for it; just a questionable business decision). |
Aspect ratio:
|
All this feature does is cropping down the original, full image to one of the non-native ratios. This affects JPEG files only; the raw ones remain uncropped (they just contain the selection flag, for use in postprocessing).
The 1:1 ratio is referred to by Olympus as "6:6", perhaps to make a reference to the most popular square film format, 6×6 cm. But then, we could refer to the first two as "12×9" and "34×24 (or "9:6"), respectively, as these were also popular film (or plate) formats. The commonly accepted approach to show a proportion is to use smallest integers describing it properly; then, why nor "218×218"? One of the preferences allows to make this feature accessible in Live View mode only or in both viewing modes. The selected crop is shown in Live View but, obviously, not in the optical viewfinder. Anyway, the feature is not really useful: cropping in postprocessing gives you more freedom. |
Type and size:
The LCD monitor on E-620, magnified |
It looks exactly like the monitor used on the E-30, except for being visibly brighter, but after a closer look under magnification (see the picture at left) I can say this is an entirely new type: the dot shapes are quite different.
The resolution remains unchanged at 230,000 RGB dots (they are no longer truly RGB, but the term persists by inertia). Three dots constitute a full RGB pixel, so this is equivalent to 77,000 pixels. (Some manufacturers still say "pixels" when talking about dots, which is misleading,) The size also remains unchanged from the E-30 (in E-510/E-410 and E-3 it was 2.5", a visible difference). Making the monitor larger without increasing the pixel count causes it to be more pixelated. Some will be disappointed with Olympus' decision not to go to a higher resolution. (Nothing comes free, though: bigger resolution means more processing, more power used, longer lags, extra cost.) Still, the display is bright and clear, and the colors (adjustable) look good. Perhaps Olympus had to make a choice between brightness and resolution? Actually, both Canon and Nikon stick to lower-resolution monitors in their less expensive models. For example, Nikon incorporates a 920,000-dot monitor only from the D90 up. This is why I was less than happy with the lower-than-expected monitor resolution on the E-30, but I can easily live with it on the E-620. One visible improvement over the E-510 (shared with the E-30, though) is the very effective anti-glare coating. While some reflections are still visible, a side-by-side comparison shows a huge difference. Very nice. |
Tilt and swivel:
|
An adjustable-angle monitor dramatically improves the convenience and usefulness of Live View, while providing less advantage in optical viewing mode or for other uses (accessing controls, image review). Your tabletop photography will never be the same.
While both Canon and Nikon now offer Live View in all SLRs, currently only the Nikon D5000 has a tiltable monitor: limited to one degree of freedom (up/down); OK for tabletop but not for over-the-crowd shooting. Oh, yes, the Sony A350 has it too. The displayed image will be inverted if needed to avoid upside-down viewing in some monitor positions. The monitor can also face forward (self-portraits?) or towards the camera back, protected from damage. (Not for shooting, though: you lose the Control Panel then.) Just for the record: a minor bug persists since the E-3: with the camera in the portrait orientation, and the monitor facing forwards, the preview is shown upside down. It is bad news for those who shoot vertical auto-portraits in Live View, i.e., about two people in the U.S. and one overseas. |
Display modes:
|
Live View, menu, and image review have their own dedicated buttons, while the Control Panel is activated with [Info]; the same button also toggles the RC flash panel, if enabled.
Some users of the E-510 will miss the simplified version of the Control Panel offered in that camera; the change is fine with me (less button pressing). The [Info] and [Menu] buttons are now located to the left of the eyepiece on the camera's back, a solution I like more than in the E-5x0/E-4x0 (left of monitor) or in the E-3/E-30 (below). Delete and Live View have been squeezed into the area around the arrow cluster, which I do not mind at all. While moving the buttons around was necessitated by the need to accommodate a fold-out monitor on a smaller body, the changes are for good: a single vertical or horizontal row of identically shaped buttons is something I complained about in the previous models. |
Image review modes:
|
A just-taken picture will be, almost immediately, shown on the monitor; the auto-display time is one of user preferences; it can be also set to zero (no preview), or infinity (entering the image review mode).
By "review mode" I mean that you can browse images, delete them, etc — exactly like after using the [Play] button, see below. Pressing the [Play] (blue arrow) button displays the last image; arrow keys can be then used to browse images and control dial — to zoom in or out. (from thumbnails to a 14× magnification). While the image is magnified, you can toggle to the full frame and back, or compare magnified fragments of two images side-by-side. This may be sometimes useful, even if the UI is a bit confusing. When a single image is shown full-frame, the [Info] button switches between more display modes (as shown in the accompanying pictures):
Pressing [Fn] in any of these display modes shows a full frame with a green box, marking the position of a 10%×10%; fragment. Pressing [Fn] again magnifies that fragment to full monitor size. Actually, there are two such states; in one of them arrow buttons are used to browse between magnified images (preserving the fragment size and position); in the other — to move this fragment around within one frame. The control dial changes the magnification (up to 14×), and the normal [Info] button functionality will be restored only when full frame is visible again. The controls become context-dependent in this design, and I am convinced this could use some streamlining. Not using this feature often, I re-learn it every time by trial-and-error. E-620 image files (ORF or JPEG) contain highly-compressed (1:14) "preview" versions 1600×1200 pixels in size. As in the E-30, these are used for raw image preview. For JPEGs, they are shown initially (with almost no delay), while the full version is being decompressed in the background, replacing the other one as soon as it is ready. This makes critical sharpness evaluation easier than in previous Olympus models — but, ironically, only for JPEGs, not for raw files. |
|
Video output:
|
The monitor information can be sent to a TV set, including Live View and image review. The video standard is one of the user preferences.
The (proprietary, included) video cable plugs into the combined USB/video socket below the arrow key cluster. The standard is like in all Olympus SLRs since at least the E-510 (except for the E-3, which has a separate video output). I am not really missing the high resolution video (HDMI) output, as I'm not using my camera for presentations. This is rather an entry level (and I mean it) feature. |
|
Power source:
One BLS-1 Li-Ion battery
|
This is the same battery as one used in the "scaled down" E-4x0 series, different than the BLM-1 fitting all other Olympus Four Thirds cameras from E-1 to E-30.
Many current Olympus E-3 or E-30 users will want to keep an E-620 body in their travel bags as a backup. For them, being unable to use the batteries interchangeably (and, worse, having to travel with two different chargers), is a painful drawback. I wouldn't mind the E-620 using the larger battery (at the expense of increased grip depth; this really does not make the camera feel bigger). Still, Olympus chose to keep this camera as compact as reasonably possible; I will not argue here, as this is largely a matter of taste. But then, at least, I would love to see a smart charger, accepting both battery types. While camera settings will not be erased when the battery is removed for charging for just a few hours, a spare one is perhaps the first accessory to get with the '620 (unless you are using one of the 400-series now). |
|
Energy stored:
8.3 Wh (1150 mAh at 7.2 V) |
This is about 77% of what the larger BLM-1 (see above, 1500 mAh) stores; less but not dramatically so, at the weight reduced to just 61% (46 g down from 75 g). Clearly, some performance-per-weight advantage.
The CIPA battery rating I found for the E-620 is 500 frames (with no Live View) — but I do not consider this a real, meaningful standard: it is not defined enough to be consistent between various cameras (or even various measurements for one camera). Anyway, this is the same as for the E-410/E-420, or 77% of the figure claimed for the E-510/E-520 (note the 77% again; this raises my suspicions). The only information I can offer you on camera's battery performance is purely anecdotal evidence from my first few weeks of using it. I've used the E-610 quite heavily, especially during the first week, and played with it a lot, without having a spare battery. With all this, I've never run out of juice, recharging the battery overnight only every second or third day. How good is that? I don't know, but I'm quite happy, and I suspect that in my usage the battery life may be better than its CIPA rating might suggest; most certainly the engineers have learned some new tricks here. |
|
Charger:
BCS-1 (included) |
The same charger as the one included with the E-4x0 series. Nothing special, it just works. The expected charge time is about 3 1/2 hours; more if the battery is completely empty (first use).
Let me repeat: why not a combined charger, working both with BLM-1 and BLS-1? After all, both use the same chemistry and voltage! |
Optional power sources:
|
The HLD-5 power grip is specific to the E-620. It accepts two BLS-1 batteries (will also work with just one). It adds 245 g to the camera's weight (when fully loaded), and provides a vertical-orientation shutter release, but no other controls (like an alternate control dial). I've seen some sources mentioning that the AC-1 power adapter can be used with the E-620 via the HLD-5. Olympus does not mention this in the specifications, and I haven't seen the grip with my own eyes to check if it has a power socket. Too bad the HLD-5 manual has not been released yet. |
|
The control system on the E-620 is quite similar to that on the E-5x0 series, based on three interfaces, partly overlapping in functionality:
Direct controls are usually fastest and easiest to use, but I often use Control Panel instead: it may be a bit slower, but gives me a quick overview of almost all relevant settings at a glance. The menu system should be used only for functions not accessible otherwise and for camera customization. These work as we would expect in an Olympus camera: press a dedicated button and turn the control dial to change a parameter. The grace period within which the dial has to be turned can be adjusted to your liking. Most of the basic settings have their own buttons; the dial may have its own no-button function, depending on the exposure mode. There are twelve direct buttons to change camera's picture-taking settings, plus five dedicated solely to menu and Control Panel access and/or to display functions. Here is a brief listing with my unavoidable comments. (If a button functionality can be reassigned, I'll be describing the default.) With the tiny formfactor of the camera, and the limitations imposed by the tilt/swivel monitor, Olympus did an outstanding job in using the available space. The control layout is, in my opinion at least, visibly improved from the E-510/E-520, and in some aspects better than in the E-30 (not to mention E-3). I like it also more than in all competing models I've tried. Regarding the comparison against the E-30 (which I like a lot!), the improvement is in getting rid of the partially-hidden, identically-shaped buttons below the monitor. This was my main UI complaint about that camera: after having used it for more than six months I still have to read the ill-visible labels on those buttons. Is this just me? On the other hand, having two control dials on the E-30 is a clear plus for me, especially when they are directly assigned to different functions. The four display-assigned buttons act as toggles (sometimes multi-state): menu access, Control Panel on/off, image replay mode, image delete; additionally, [OK] is used to confirm a menu or CP choice (or to call up the Control Panel in a subtly different way than the usual [Info] button). Out of the twelve dedicated to picture-taking, one also works this way (Live View on/off); the Lock button is held down to lock the exposure or focus, and the remaining ones quite strictly follow the press-and-turn metaphor. (Well, the function, or [Fn], button also may work the other way, depending on how it is assigned.) There are slight departures from the general rules here: the flash button, when pressed first, raises the flash unit and only then can be used to change the settings, and the AF point selection one, [...], Because of space limitations, the arrow cluster buttons have dual functionality: when the menu or Control Panel is active, they are used for navigation; otherwise each has a "direct" setting assigned (ISO, WB, metering pattern, AF mode). I do not find this solution confusing or impractical: even if less elegant than "real" direct buttons, it is almost as functional. A special "direct" control is the mode dial, very similar to one found on most SLRs of the last thirty years or more. Not much to say here, except for my major gripe (the same I had about the E-30): the dial provides no direct access to the user-defined My Mode presets. I find this omission inexcusable to the point of being offensive, especially when Art/Scene Modes have their own slot on the dial. (Yeah, right, we're using those all the time!) The way things are, the custom presets remain practically inaccessible. A quote from my E-30 Review and Reference: You may suspect me of a fixation on this point, but implementing a relatively basic feature only to make it inaccessible does not make any sense. Presently you may define two user modes (parameter combinations), then one of them has to be elevated to the special status (or, as Olympus wants it, "executed" from the menu system). This, however, does not put the camera in that mode; it will become active only while the [Fn] button is held down, without any adjustment possibility, not even exposure compensation. Yes, I still have strong feelings about this. Now a minor surprise: backlighted control buttons! This may be just a matter of looks and convenience, and I was apt to dismiss this feature — but I have to admit I like it, and found this useful more than once. When the camera is turned on, the control buttons on the back lighten up, to go out after a minute of inactivity, and to become alive again when any of the controls are used again. (To be exact, the first three seconds after the camera is turned on, the light intensity is higher.) The three buttons at the top right (Lock, Function, and AF Point) are excluded from this; perhaps the designers thought these are less likely to be confused with others and therefore may not need this feature — that's for you to judge. The light is provided, most probably, by light-emitting diodes, so the impact on power usage should be quite negligible. On a more serious note, some of the button functionality can be customized:
Besides all that, the logic behind the AE/AF Lock can be changed in many ways, as described elsewhere. The Control Panel is shown on the color monitor and invoked with [INFO] button to the left of the eyepiece or by pressing [OK] in the arrow cluster. There is a subtle difference between these two ways: when invoked with [OK], the panel does not show exposure data (including compensation) and goes off very soon. Also, while in both cases the CP goes off when you half-press the shutter release, after OK it does not come up again. Therefore the second way of invoking it may be understood as a more economical (battery-wise) way to change a setting. Actually, I never noticed this difference in the E-30 and also in the E-510 — it was already there! The Control Panel shows most of the camera settings, most of which can be changed using the cursor keys to select a parameter and a control dial to change it. Pressing OK during that process does not confirm the setting, but gets into its dedicated screen, which is redundant and annoying. A minor flaw (just don't do it!), but still ugly: OK should mean "accept" here, and not "show me another way of doing the same". Still, I like the Olympus Control Panel a lot; clearly more than any similar solutions from other manufacturers. Comprehensive yet simple. For the record, here is what is shown and/or adjustable in the Control Panel (the list is identical to that for the E-30). Settings marked with [D] are also accessible via direct controls, with [M] — from the menu system.
While the items on the list are, indeed, identical to those in the E-30, fewer functions are now duplicated in the menu system, which I consider an improvement (I complained on this redundancy): the menus are simpler; see the next section. (Obviously, there is nothing wrong about an [M] in the right column!) The area above the white stripe shows aperture and shutter speed, as well as exposure compensation (both numerically and as a scale). The scale may also show flash compensation and bracketing, in a mildly confusing way (still, no real complaints here). If the Remote Flash feature is enabled, then pressing [INFO] again will show its dedicated page. As I already said, I like this system. Still, for the E-30 I drew a list of some minor things which could have been improved, and this list remains unchanged for the E-620; you can see it here. The E-620 menu system is quite similar to that on the E-3, E-30, or E-520, with a few changes, mostly for the better. In an attempt to address complaints about the system complexity, Olympus made some steps, the most visible of which was hiding the Settings 1 menu (now renamed to Custom and denoted with a gear icon). To see it, you have to activate its display in the former Settings 2 (now referred to just as Settings. Actually, this might have been a smart move, as many of the complainers did not understand that you can live with the camera for a year, never accessing that menu (which contains about 75% of the camera's settings). So, the system did not become simpler; it just looks simpler to a person inspecting the camera casually, who will never guess what is hidden there (and therefore may devote more attention to the revolutionary Art Filters). No harm done; I always (E-510, E-3, E-30) kept saying that the options from that menu should be set once to customize your camera, and then left alone. (Well, at least most of them, with very few exceptions.) This remains unchanged in the E-620. Some of the complexity of the Custom menu cannot be avoided: it allows you to customize almost seventy (!) preferences. Other manufactures just do not include all these options; certainly not in this price range. This necessitated splitting that menu into nine sub-menus, also a good step. There is, however, some confusion arising from arbitrary, often illogical, assignment of options to submenus, and, by golly, after all those years of using Olympus cameras, I still sometimes find myself lost. Just today I spent five minutes or so trying to activate the mirror lock (or, as Olympus wants it, Anti-Shock). This option adds "locked" versions to all drive modes (single, serial, remote, etc.), so, obviously, I've been looking in the Release/Drive Mode submenu (C). Nothing. Only after going through all submenus, I found Anti-Shock under Exposure/Metering/ISO (E), of all the places! In the E-30 write-up I'm quoting more of such cases. Now the good news. At long last, some of the redundant items were taken away from both Camera menus, which were reduced from two pages to one each. What a relief: the settings I really need to access here are no longer hiding among ones which are much easier to set directly or from the Control Panel. Some of the redundancy is still left, but about half of it is gone. Not really gone, though. All or almost all of those settings have been moved to various Custom sub-menus; i.e., swept under the carpet. Some of that makes no sense: who would want to go to that menu (having to enable it first) just to change the ISO, or to switch to a different memory card? The Play menu (one page) remains unchanged since the E-30; I never use it anyway (most of it relates to in-camera editing or direct printing). Last but not least, the current Settings menu has been slightly reduced, so that it fits now into a single page. (Some items have been moved to Custom, as I suggested for the E-30.) To sum the menu system up: it improved again, if just a little. After the Custom menu has been used to set up your camera, it may be hidden, and then you have just four menus, each fitting into a single page. Even that could be still streamlined, though. Maybe one day. On camera customization: you may refer to my E-30 customization article, which is mostly applicable to the '620. Keep in mind, however, that some of the settings I'm recommending for that camera may have to be changed for this one because of changes in the imaging pipeline. Still, I hope you will find that article useful. As of this writing (June, 2009) I've spent only three weeks with the camera and I am still learning how to use it. Of course, I've shot a few hundred frames with the E-620, but most of them not under semi-controlled (or at least familiar) conditions as I usually do. Some of the examples are shown and discussed in the E-620 Samples, Part 1 page; a more detailed analysis of how the images depend on sensor gain can be found in E-620 Samples — Full ISO Range. The first impression is very positive — but this is my usual experience with Olympus cameras, especially the E-System SLRs. This is becoming predictable... Contrary to some expectations, however, the results are not identical to those I've been getting from the E-30 or E-3 (which are hard to tell apart from each other). While visually very pleasing, my E-620 images are not as smooth as those are; somehow more "digital". There is also more noise (not just the amplitude, but also coarser pattern and some artifacts), especially at lower ISOs; this starts showing in the shadows already at ISO 200, where I can see some noise clustering (brownish blotches in outdoor out-of-focus shadows) and banding, which, surprisingly, is vertical here. This may be a difference in the sensor or in the rest of the imaging pipeline; I suspect the former. The latter is just firmware; why would Olympus bother to change it? While both sensors have the same resolution, I think they may be actually different, with the one in the E-30 having some advantage. Surprisingly, at ISO 800 and, even more, above that, the noise/detail performance of the E-620 is more to my liking than that of the E-30. The noise amplitude increases a bit, but there is more detail visible in the image — at least at the same nominal settings. (For more on that, see my full ISO range samples. At all ISOs the detail in E-620 images is most impressive, even with the cheap kit lenses, and at standard noise filter settings. Is it possible Olympus is using a less intrusive antialiasing filter here? These are just my early impressions, and some statements here may still have to be modified and refined, but, generally, I have no doubts about this. With both cameras at hand I am in a position to shoot some comparative samples. Then, I will also have to tweak the E-620 imaging parameters (sharpening, noise filtering) to take the full advantage of that camera. Only then a meaningful comparison will be possible; I'm slowly getting there... Writing on Olympus gear since 2000, I will be repeating myself here, but this cannot be avoided. Some things never change, so here it goes again. Olympus documentation does not give justice to their cameras, and the E-620 is no exception. The 150-page printed Instruction Manual comes in the box (here is the PDF file), and while it looks good at the first glance, it continues the tradition. On the upside, it is well-organized, nicely laid-out, readable, and has nice line drawing illustrations. On the downside, it does not contain much information which a moderately educated amateur photographer would not figure out by playing with the camera. I may be a physicist by education, but it does not take an Einstein to figure what the Portrait Picture Mode may be suitable for (I was thinking motor races). Some description beyond "produces beautiful skin tones" could be useful, at least to some photographers. This example illustrates a rule, not an exception. The whole manual may contain two pieces of information you really would appreciate, but they are deeply buried in piles of trivial and unnecessary statements. Secondly, the English used is poor, often clumsy, unclear or misleading (sometimes a combination of all three or more). It took me 20 seconds to find this example: "The camera sets the flash mode according to various factors such as firing pattern and flash timing." In my naivety I thought these factors are dependent on the flash mode set; just the opposite to what the sentence (obviously, botched in translation) implies. Once again, I am sure I can find a hundred of similar (or worse) passages. Last but not least, the translator often ignores the generally accepted English terminology in photography (and not only), using some arbitrarily coined (often unclear and misleading) terms instead. (There are just a few cases of this, but they are painful nevertheless.) Why can't a company employing some of the most brilliant and innovative engineers in the industry hire someone willing to write about their cameras and knowing how to do it? Is this a union job? The software included with the camera is Olympus Master, version 2.10. I've installed it on my computer just to see if anything important changed since the versions I've tried before: not much, except that it properly reads and converts raw images from the E-620. (So does Olympus Studio 2.20 from six months ago.) This application is included with all Olympus cameras (not just SLRs), and as such it caters to all segments of the market. It also tries to combine three areas of functionality: image browser, elementary image editor, and a raw-to-RGB converter. Trying to do everything for everyone is a risky undertaking, and, predictably, Olympus Master does nor impress in any areas of its expertise. As a browser, you will be much better off with ACDSee, or even one of the free offers, like IrfanView or FastStone (very polished, quite capable, if not a speed demon). As an image editor, any inexpensive option, like Photoshop Elements (which I dislike for more than one reason) or Paint Shop Pro (which I quite like, even if I don't use it too often) will be much better; well, even the image editing features of the Fast Stone are better than those in the Olympus software. The Master is better in the raw development area: while the user interface is modest and options quite limited, it uses (as far as I can say) the same processing engine as Olympus cameras, which is very good, not leaving much unused information behind. If you need to use the raw format occasionally, Olympus Master will work just fine. I wasn't able to hook it up to an external image processing programs; you can "register" such an application, but it is completely unclear how to transfer the developed image to it. The included help file does not seem to contain a single bit of information on the subject. Oh, well. Olympus Master can also transfer your images from a camera to the computer — a feature possibly useful to those who do not know how to copy files from an external disk drive (which the camera pretends to be). I will not comment on this. The Olympus Studio (of which a trial copy is included on the CD, good for 30 days) may be worth the $100 expense (still, I think Olympus would be better off including it with its higher-end cameras). While its image browsing and editing capabilities are practically the same like in the Master, raw development seems to be a bit more polished (using, most probably, the same engine); it also has a nice module for controlling a camera remotely. The Studio shows some of the EXIF information embedded in image files, including some of the Olympus-specific items (the Master does not do it; a bummer). Still, this is no competition to a good EXIF reader like ExifTool (combined with the ExifTool GUI front end), for which I wrote a custom, Olympus-specific setup, showing only the information of interest (and all of it). Another thing you will need Olympus Master or Studio for is updating the firmware in your camera or lenses. This is an automated process, which you must do from one of these programs, with the camera hooked up to the computer (and the lens mounted, if applicable). While someone having no computer skills whatsoever (again, I'm talking about copying files, not rocket science!) may appreciate this, the lack of an option to do it just by placing a file on the memory card (like in the C-5060WZ from Olympus a few years ago) would be preferred by many, myself included. My camera came without any lens (I have plenty of these already). The box (a packaging more modest than that of some previous Olympus cameras I bought, but this is a good thing) contained also the following:
This is the same kit as one I've got with the E-30, no surprises. The E-620 is a very capable, well-designed and well-executed camera; Olympus knows how to makes these and does not artificially limit the capabilities of its less expensive models. They went full Monty here, not cutting corners on anything of importance. The camera fits beautifully in hand (in spite of the small size) and is a real joy to use, especially with the inexpensive, tiny "kit" lenses: 14-42 mm and 40-150 mm ZD. (Yes, some of the bigger lenses will be better, but these are more fun!) It is hard not to like how it feels and operates. While with the E-510 I used mostly the 14-54 mm ZD, and with the E-30 the 12-60 mm ZD (my favorite on the Four Thirds platform), with this one I mostly reverted to the kit lenses. They may be not as good as the more expensive (and heavier) glass, but still good enough for most of my photography applications. (To be frank, I also sometimes sneak in the 50 mm Macro ZD; but this is a lens everybody should have.) Actually, I'm going for a Polish vacation (hiking the Tatras again!) after the 4th of July, and I decided to bring just the E-620 with the two kit lenses along — traveling really light and hoping that nothing goes wrong (no backup!). Living dangerously. As for the results delivered, I have no major complaints, although I'll have to wait for a few more weeks with the final (?) verdict; see Image Quality above. Now, is the E-620 a smaller, lighter, and cheaper E-30, as some would like to think? No it isn't. The E-30 has a better viewfinder, top-deck status display, second command dial (with the first one better placed), plus a dozen or so less visible advantages, which add up to the difference. One feature I found especially useful is the level gauge: I usually tend to tilt my framing to the right, and the gauge helps a lot, visible in the viewfinder (why could Olympus put it in the tiny E-P1, but not in the '620?) Regarding image quality, the E-30 seems to have some edge. While in typical outdoors shooting situations the differences are hard to tell, in some situations (large shadow areas, less-than-optimum light) I can see them quite clearly at ISO 200. Tonal transitions are not quite as smooth, and the noise pattern in defocused, dark backgrounds is not as pretty as in the larger camera. On the other hand, at ISO 1600 or so, I would prefer to use the E-620 for more detail, as mentioned above. The E-30 has a clear edge in autofocus accuracy, reliability, and speed; no doubt about it. This may show mostly in low light, but for some users it may be important. On the other hand, the E-620 is hard to beat in the area of cuteness factor and carry-along appeal, and the illuminated buttons (in addition to looking so good) are not just a novelty. Choosing between these two boils down to a couple of questions. What is your preference regarding weight and size? How important are the extra features in the E-30? What about the viewfinder or better AF system? Will you notice the differences in imaging affect the kind of pictures you are taking? I think 80% of the enthusiast-amateur photographers may be happier with the E-620, saving a few hundred dollars. The remaining 20%, however, will prefer its bigger sibling; this largely boils down to personal needs and preferences. Well, I'm glad I don't have to make this decision, being lucky enough to have and enjoy both models. I am sure neither will spend much time in a drawer. Out of the $350 price difference in the U.S. ($600 versus $1050, minus a $100 rebate, as of late June), the level gauge is certainly worth $100 for me, and so is the larger, brighter finder (this does not come cheap!). Throw in $50 for the external status display, a few more dollars for the second dial, for the higher frame rate and DoF preview — at current prices the E-30 may turn out to be quite a bargain. When compared to other manufacturers' models in this price range, the E-620 seems to be hard to beat, although, admittedly, the competition is heavy. While I like the Nikon D5000 (less so the Canon 500D/T1i, even with all these impressive specs), I still would give a nod to the E-620, even not counting my existing investment in Olympus lenses (which is not so big, anyway). The camera is loaded with features usually not seen in this price range, and shows performance to match. The '620 seems to be selling very briskly (with dealers running out of stock now and then), not only because of how it operates and performs, but also because of more appeal to the specs-checking crowd (maybe the Art Filters, a pact with the Devil?). Whatever may be the actual reasons, I'm glad to see this; the camera deserves that. For more of my remarks or advice on switching/upgrading to the '620, see the conclusion of my introductory article. Here are my other articles on the E-620, just three:
As usual, I write my article first, only then looking what the others wrote, so that I can compare my observations with theirs, possibly correcting or rethinking some, but, at the same time, not being influenced up front. This usually works best, also being the reason why the initial version of this list is very limited.
| |||||
|
|
My other articles related to the |
|
Olympus® is a registered trademark of the Olympus Corporation.
This page is not sponsored or endorsed by Olympus (or anyone else) and presents solely the views of the author. |
| Home: wrotniak.net | Search this site | Change font size |
| Posted 2009/06/26, last updated 2009/06/28; cleaned up 2013/11/02 | Copyright © 2009 by J. Andrzej Wrotniak |